This procedure is not as easy as a shot to the withers, but if you follow the algorithm below correctly and do not worry, everything will go smoothly and the IV will be placed correctly. The recommendations given in this article are also relevant when giving intravenous shots to dogs.
- How to give an IV for a dog or a cat yourself
- Procedure
- How do I give a cat and cat drip?
- Preparing to put the cat on a drip
- Putting the cat on a drip
- Installation of catheter and dropper
- Basic rules
- Preparatory step
- Installing the system in a cat
- A little about the nuances
- How to give a cat drip in the withers
- What problems may arise when inserting a dropper
- Possible Mistakes
- General information
- Algorithm of putting a drip to the animal
- Indications for cat drips
- Methods of administering liquids to the pet
- Subcutaneous
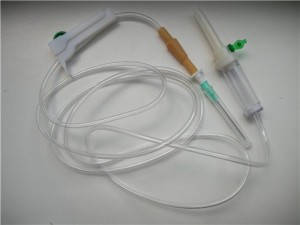
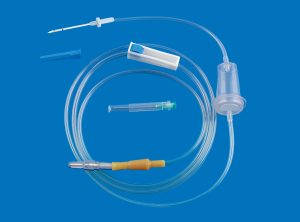
- Types of needles for droppers and set of the system
- Basic principles and recommendations
- Assembly of the system
- Possible errors and complications
How to give an IV for a dog or a cat yourself
Before putting a drip at home, it is important to properly arrange a comfortable place. It is recommended to drip the pet on a flat surface – a table. You can put a disposable diaper on it. In advance, you should prepare a bottle for drip infusion with the required amount of solution. Then draw the drugs for trickle infusion into the syringes, in certain dosages. For convenience, it is recommended to sign the syringes with the dialed drugs with a marker.
- The first thing to do is to open the package with the drip system.
- Then close the roller clamp (by moving it down).
- Then remove the protective cap from the needle, inserting it completely into the vial with the infusion solution.
- The vial is hung over the table, so that it is a few centimeters higher. Otherwise, the drip will not drip.
- Using two fingers, gently squeeze and release the filter until the solution is half full.
- To release air from the system, open the roller clamp until the solution appears from the system.
- At the end, you must make sure that there are no air bubbles. If air bubbles are present, the manipulation is repeated until they are completely out of the system.
Procedure
To put a drip yourself at home is not difficult, it is enough to follow the instructions below:
- The pet is placed on a prepared place (on its side).
- After that, the catheter is unbundled and flushed. To prepare the lavage solution, you need to take a 5 ml syringe, fill it with 0.9% NaCl. To flush, open the upper valve of the catheter, connect a syringe to it (without needle) and inject about 2 ml of prepared solution, then close the valve. If there is no upper valve, flushing is carried out through the cannula.
- Next, the cap of the catheter is unscrewed from the side, connecting the cannula.
- The next step is to turn on the dropper. It is important to preadjust the rate of injection of the solution. On average, when performing manipulations with a cat, 20 drops in 60 seconds is enough. Accordingly, the injection of 100 ml of solution will take about 120 minutes.
- During the drip very slowly, you can introduce additional means for trickling into the rubber band.
- After all the solution is dripped, the dropper is turned off and the clamp is closed.
- Next it is required to disconnect the cannula from the catheter.
- Finally, the catheter needs to be flushed, closed, and bandaged.
It is important to note that in case of negative effects (for example, redness and swelling of the paw, local fever), it is important not to delay a visit to a veterinarian.
How do I give a cat and cat drip?
Remove the protective cap from the vial needle and insert the needle fully into the vial with the infusion solution by piercing the rubber stopper on the vial.
Hang the vial with the infusion solution over the table on a nail, cabinet handle or other suitable object at a level well above the table, otherwise the drip will not drip. If the bottle does not have a special lug for hanging, it is convenient to use a cellophane bag.

Next, with two fingers several times squeeze and release the sub-needle area (air trap, dispenser) so that it is filled halfway with the solution.
Preparing to put the cat on a drip
Prepare a convenient place for putting the drip to the apartment. It is convenient to drip the cat on the table, you can put a blanket or a disposable diaper on the table. Prepare a bottle (bag) for drip infusion with the necessary (measured) amount of solution for infusion. Draw the drugs for drip infusion into the syringes, in the required dosages, dilute them if necessary. Label the syringes with the drugs you have drawn with a marker (drug name).
- Open the package with the drip system.
- Close the roller clip by sliding it down.
- Remove the protective cap from the bottle needle and insert the needle completely into the bottle with the infusion solution, piercing the rubber stopper on the bottle.
- Hang the vial with the infusion solution over the table on a nail, cabinet handle or other suitable object at a level well above the table, otherwise the drip will not drip.
- Then use two fingers to squeeze and release the sub-needle area (lake) several times so that it fills halfway with the solution.
- To bleed air from the system, open the roller clamp until the solution emerges from the system.
- Make sure that there is no air (air bubbles) in the system. If there is, open the clip again and wait for the air bubble to come out of the system.
Putting the cat on a drip
[
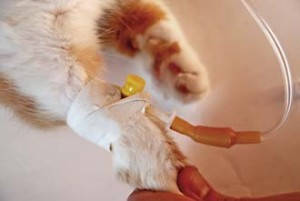
- Lay the cat on the prepared table on its side. If the animal is restless, you may need help.
- Unbind the catheter.
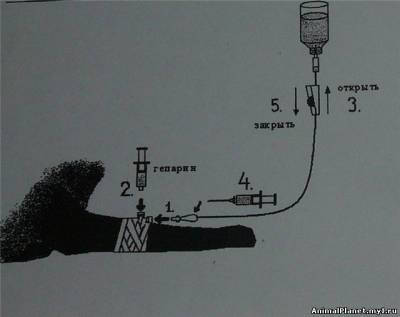
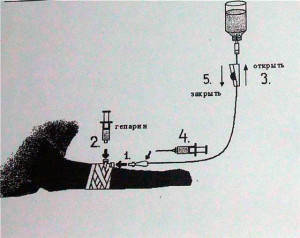
- Rinse the catheter. The solution for washing the catheter is prepared as follows: take a 5 ml syringe, fill it with 0.5 ml of heparin, add 0.9% NaCl (saline) to 5 ml. To flush the catheter open the upper valve of the catheter (2), connect a syringe without needle with the flushing solution to it and inject 0.5 ml (not the whole syringe, but 0.5 ml), close the valve. If there is no upper valve in the catheter, the catheter is flushed through the cannula to connect to the drip system (1).
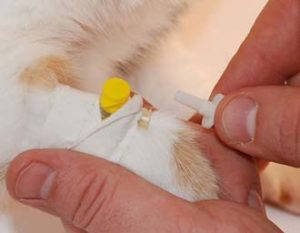
- Unscrew the cap of the catheter (on the side) and connect the cannula of the drip system (without needle) (1)
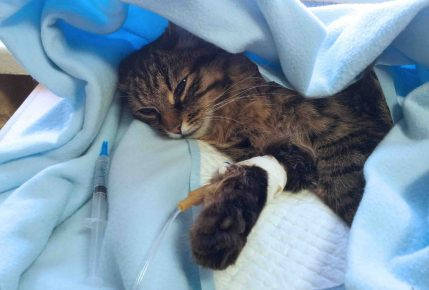
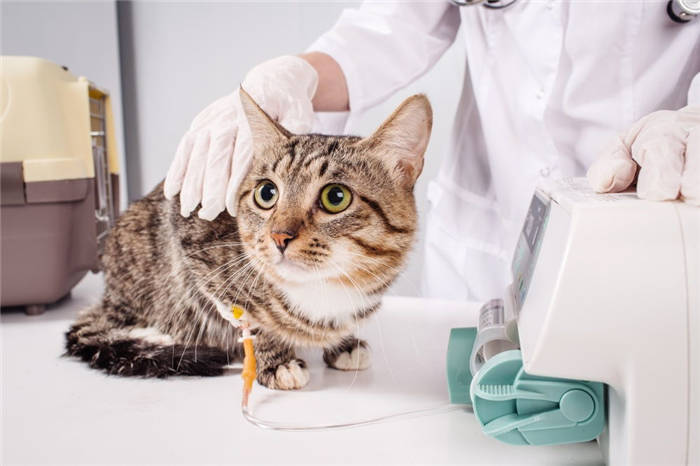
- Open the clamp and turn on the dropper (3). Adjust the rate at which the solution is administered. The average speed of solution administration for a cat is 20 drops per minute, i.e. the injection of 100 ml of solution should take on average 2 hours.
- During the drip administer additional drugs for trickling into the rubber band (4) (syringe with needle). All medications are injected slowly!
- When all the solution has dripped, turn off the drip by closing the clamp (5).
- Disconnect the cannula of the drip system from the catheter (1), close the cap of the catheter.
- Open the upper valve of the catheter (2), flush the catheter (see point 3). Close the valve.
- Tape the catheter.
Warning! If you have never done this before, seek professional help. Make sure you give your cat's first injection at the clinic, ask the paramedic or vet to show you how to do it: how to handle the catheter, refill the drip system, adjust the speed of injecting solutions, and inject the drugs in the syringes by trickle. Be sure to clarify with your doctor what drugs, in what dosages you have to inject through the catheter (some drugs such as suspensions, etc. cannot be injected intravenously), most drugs when injected intravenously must be diluted, for example, with saline (NaCl 0.9%), so specify which of the prescribed drugs you must dilute, what solution and in what volume.
Installation of catheter and dropper
Basic rules
- Only room temperature solutions are allowed to be used.
- The rate of delivery is set low:
- standard – a drop in 2-4 sec;
- Emergency – 1 drop in 5-6 seconds.
- The system should be deaerated.
- Provide the cat with constant attention.
Back to table of contents
Preparatory step
Prepare all solutions and the necessary medicine to be injected through the catheter. To do this, measure the dosages. Lay out the system, needles, sterile tissues. The tube should be clamped with a roller clamp, scrolling the regulator all the way down. Suspend the bag with the solution down the throat. It is better to put it at a height of 1-1.5 meters. Insert the needle into the feed cap, squeeze the filter with your fingers to fill it halfway with liquid. Open the clamp and wait for the tube to be completely filled with solution until the first drops appear from the needle or cannula. Close the system and check for bubbles. If there are, drip some more fluid through the tube.
Installing the system in a cat
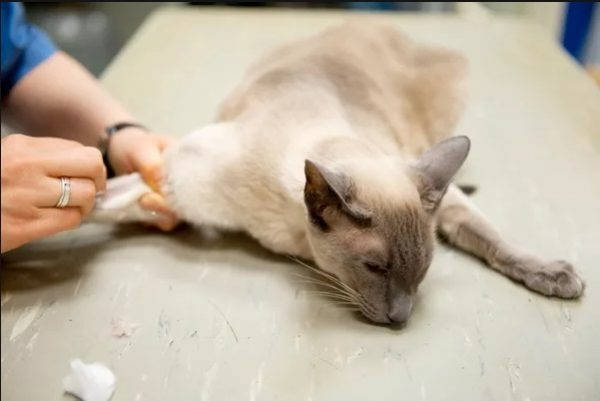
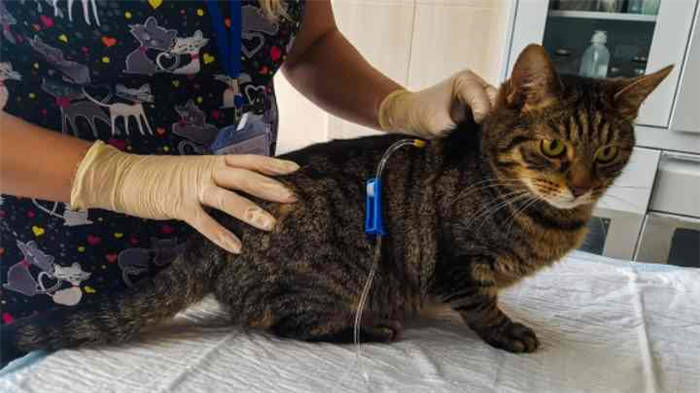
- Shave the puncture site and disinfect with alcohol. This is often done between the elbow and wrist joints of the front limb.
- Lay the cat on its side and fix it in place.
- Put a tourniquet or bandage around the puncture point a little higher.
- Bend and unbend the limb for blood flow.
- Carefully insert the needle (catheter). If everything is correct, a couple of drops of blood will appear in the instrument. It is important that there are no bumps or redness at the puncture point. Secure it with a plaster.
- Connect the system and set the speed.
If you need to put a drip in the withers, the steps of preparation are similar, as if you inject the solution intravenously. For a small kitten, it is better to use a butterfly needle. Insert it to the full length, open the clamp and set the speed – 1 drop in 1-2 seconds. Veterinarians warn that in one place allowed to give no more than 20 ml per 1 kg of cat weight. After the procedure, a swelling appears under the skin, soft to the touch. It should dissolve after 2-8 hours.
A little about the nuances
There are cases that after the installation of the catheter at home, the solution does not drip. The reasons for this are as follows:
- The cat's paw is pinched and the vein is compressed. The solution is to put the pet on its side and extend the limb.
- The catheter is clogged. Then rinse it with NaCl or 5% glucose solution.
- The clamp on the tube is too tight or the filter is not open.
For some time after the procedure the cat is lethargic and apathetic. This condition is normal. During this period, the kitten does not want to eat, but he must drink. It happens that the pet begins to vomit. If there is undigested food in the vomit, then it is normal. But if you find foam, bile and mucus, you need to see the doctor.
It is necessary to go to the vet immediately when the cat has suddenly become worse, and its temperature has risen. It is also bad if the cat refuses to drink at all.
How to give a cat drip in the withers
In order to put a subcutaneous drip on the cat, you must follow the rules:
- Prepare all the necessary equipment:
- drip system;
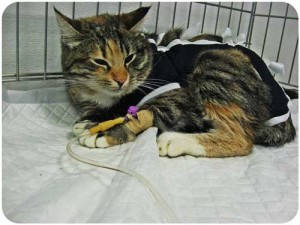
- A fixing bag or plaid;
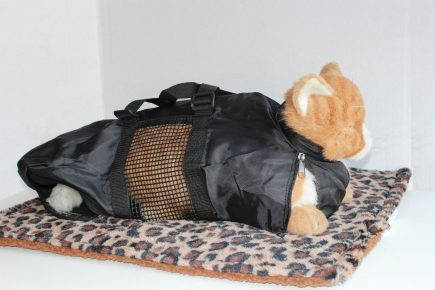
The fixation bag has a system of zippers and flaps that allow separate access to any part of the cat's body
- Plug the medication hose into a container with the medication solution, drain off a small amount of the medication to remove the air.
- Close the drug supply with the adjustment wheel.
- Attach the needle to the end of the hose, making sure it is securely fastened.
- Place the container with the medicine vertically upwards at a height of about 50 cm from the animal.
Make sure that the medicine is warm before starting the procedure. A cold solution will cause anxiety in the pet, which means that difficulties are ensured.
Some inexperienced owners may be frightened by the "hump" formed on the withers after the procedure. Do not be alarmed – it is normal. In addition, the medicated "hump" may move down into the chest or ribs. This is also absolutely normal. This "hill" will dissolve within 2-8 hours by itself and will not cause any discomfort to the cat.
I have no experience with IV therapy. But subcutaneous injections to the withers have been given more than once. For those who have had this procedure for the first time, it will be interesting to know that the cat's skin is quite thick. It confused me the first time I injected a cat, as I had only injected my much thinner-skinned relatives before. Imagine that you have to pierce with a needle a thing made of natural fur – a fur coat or a hat (you can try it). Approximately the same sensation will occur when the needle is inserted into the withers. It feels as if it meets an obstacle, and then under pressure easily enters the subcutaneous space.
What problems may arise when inserting a dropper
Cats are suspicious and freedom-loving animals. Any fixation of the body can drive the animal into a frenzy. The procedure itself lasts 5 to 10 minutes. The animal's mobility may cause the needle to break. This does not happen often. That is why it is so important to securely fix the pet. But it is possible to give sedatives before the procedure only by agreement with a specialist.
It is necessary to strictly observe the sterility of the instrument for the drip. A dirty needle or drip system can provoke an abscess. This is a very undesirable complication that significantly worsens the condition of an already weakened pet.
Possible Mistakes
The most common mistakes when performing the procedure yourself are as follows:
- The choice of dosage. It must be remembered that a negligent attitude and carelessness to the appointment of a specialist can lead to death in the pet, even if appointed a harmless drug. When in doubt it is better to check again.
- Incorrect insertion of the needle. Often inexperienced owners do not insert the needle deep enough. As a result, its tip remains in the skin. It is easy to check this: after the needle has been inserted, you must move the syringe to the left and right. If the needle tip moves freely, everything is done correctly. Another variant of a mistake can be a through puncture of the skin. In both cases the medicine will be spilled on the cat's fur, which the owner will immediately notice.
Taking care of a pet means taking full responsibility for its life and health. Thoughtful, loving and competent owners will always try to learn many of the procedures for caring for their pet. The technique of performing hypodermic drips is not complicated and can be done by almost anyone. And when the life and health of a furry family member is at stake, there is no choice at all.
General information
It is necessary to put a drip when the animal is severely dehydrated, poisoned, when the animal suffers from kidney failure. The procedure helps to restore the water-salt ratio of fluids. In other situations, cats on the mend are in need of an IV, but IVs must still be placed. Remoteness from a veterinary facility is her one reason for having to perform the procedure yourself.
It is important to remember! Neither video, nor a clear algorithm of actions can replace practice and experience. The system should be put in place only in a situation where it is the only chance for recovery and there are no other options. For prudent owners it is better to be present once or twice at the vet's office when the drip is given and see what nuances there are to it.
Most cases are handled by injecting the medication into the withers. A poorly trained person may not be able to get into this area – then it's easier to put in a drip system. For a small cat's paw, it is convenient to use a butterfly – a needle with a small size and plastic wings that provide a secure attachment to the limb. The bag or bottle with the drug is placed above the animal at a height of 40 to 50 cm, it can be hung by placing it in a bag-jacket, tying the ends and fixing it in a suitable place. Each dropper set has a chamber that separates oxygen from the liquid; infusion bag (needle for insertion into a container with a solution); dispenser with a runner to adjust the infusion flow (can be jet and drip); rubber conductive hose; cannula (for additional introduction of drugs).
Algorithm of putting a drip to the animal
- Shave the area where the dropper will be placed.
- Take care of the sterility of the device and cleanliness of the hands (they are treated with alcohol).
- The medicine should be warm – its uncomfortable temperature will disturb the pet, and this will cause difficulties in the manipulation.
- An intake needle is inserted into the rubber stopper of the fixed vessel with the medicine. The second needle provides air flow and also pierces the plug.
It should be remembered that if there is a small soft swelling in the area of the infusion – the needle should be repositioned, as the medicine goes under the skin.
The whole procedure will take 5 to 10 minutes. If the animal moves, there is a risk of breaking the needle. So the success of the manipulation depends on the fixation of the pet. A sedative should be prescribed by the doctor.
Cats' skin is quite thick, when infusing you have to apply a force equal to the force of a fur hat piercing. Incorrectly inserted needle (insufficient depth) is a common mistake when administering an IV. You can check your actions by moving the syringe to the right and left – a slight movement indicates correct insertion. What are the signs that the algorithm is violated?
Behavior of cats after manipulation – Sluggish and apathetic, but this is normal and even the lack of appetite should not be alarming. It is better to try to give the cat water or broth.
A puffy muzzle is a bad sign! The medicine injected was not well tolerated by the body and caused swelling. It is necessary to administer an injection with an antihistamine agent immediately. With Quincke's edema prednisalone is suitable (for a 4-5 kg animal – up to 15 ml of solution). Be sure to show the cat to the veterinarian, as perhaps the cause of the allergy was an acute liver or kidney failure. You should also take the cat to the vet if he vomits bile, foam or green after the drip. The veterinarian will select a new type of therapy and detoxify the body.
Indications for cat drips
The unconditional indication for a pet IV is a diagnosis by a veterinarian. Self-treatment and determination of the disease at home should not be engaged in any case, because it is extremely difficult to diagnose the disease correctly, not having enough experience to do so. However, it is necessary to know the key symptoms in order to describe the condition of the pet to the doctor correctly, if due to the remoteness of the nearest clinic the owner has no opportunity to show the pet.
So, the most common cases for an IV are:
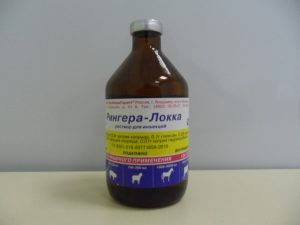
As a rule, saline solution (average daily dose – 20-30 ml per 1 kg of animal weight) or Ringer-Locke solution is administered with a dropper, and the introduction of 5% glucose is also practiced, but this drug is prohibited for animals with diabetes, and with head injuries or seizures is used with caution.
Methods of administering liquids to the pet
There are the following methods of administering fluids using an IV (or system):
Systems are placed directly into the vein for a single drip of medication, and systems are placed through a catheter for regular drips. Let's look at each method of administering fluids.
Subcutaneous
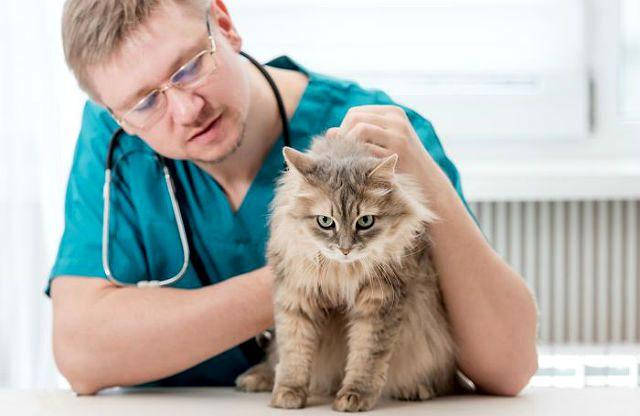
The injection into the subcutaneous tissue is considered to be the most painless compared to the others, but this does not mean that the cat will not resist the intervention. Before the procedure begins, the animal is placed on its stomach so that the withers are as free as possible. In the space between the shoulder blades and the base of the neck, the fur is pinched along with the skin and pulled upwards. The needle is inserted into the triangle formed in front of the fingers. For convenience, the pincer is not made transverse to the cat, but along it, so that there is more space for the needle. At the same time, the syringe must be placed at an angle of 90 or 45 degrees to the skin surface. To ensure this requirement an empty syringe is sometimes placed under the dropper needle, which lifts the tube at the desired angle.
In the case of a single injection, the procedure may be performed in the groin fold. The dropper is connected only to the needle placed in the withers.
When administering hypodermic injections there is swelling at the injection site, this is a normal reaction of the body to the procedure, there is no need to stop the injection.
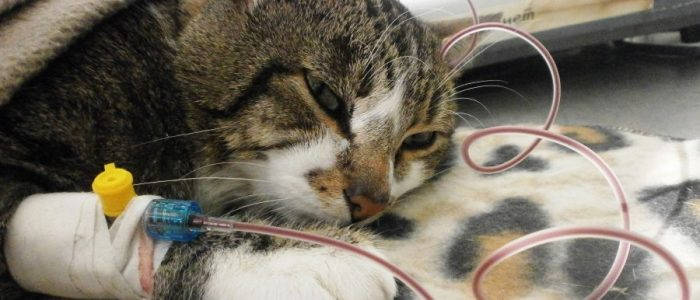
To treat my cat I gave him hypodermic injections. The cat reacted rather restlessly, but due to the fact that hypodermic injections are allowed to be administered quickly, he tolerated the procedure in the most dignified way. The injection was made in the withers, as the cat was lying down and even if I wanted to get access to the groin fold, I could not. I have not found anything difficult, except for mental anguish, in the process. However, an IV is still different from simply giving a shot.
My acquaintances had a cat who had been spayed rather late in her life and suffered complications. For treatment, the doctors prescribed an IV and the drug was administered subcutaneously. The procedure was performed at the clinic, but in the presence of the owner of the animal. Doctors would set up the system in the treatment room and then leave the owner alone with the animal to wait for the drug to be administered. When injecting the IV into the withers the needle can be fixed with a plaster, but the hair makes it unreliable, so the owner must hold the tube with his hand. Fortunately, the cat of my acquaintances had a quiet temperament and didn't twirl in their hands, plus a sick animal is more lethargic and docile in response to the owner's will by default. Near the middle of the drip, the cat usually fell asleep, but periodically still tried to roll over and I had to calm her down.
Types of needles for droppers and set of the system
The main part of the dropper is the needle. The entire system is attached to it. Needles can be divided into three main types, which differ in appearance and function:
- Classic needle – familiar to everyone. This type of needle is not well suited for cats because. is too large and it is difficult to fix it on the paw.
- "Butterflies" – very similar to the classic needles, but they are shorter and smaller in diameter, which in turn is more preferable for the cat. There are plastic taps on the edges of the needle, which are used to securely fix the needle. They are used in the case if the dropper needs to be placed once.
- Braunulae are peripheral catheters. They consist entirely of plastic and are extremely minimally invasive, because the catheter can remain in the vein for a long time, if medications need to be administered more than once.
- Intake chamber. It is a kind of filter that separates the air from the medication. It also acts as an indicator of the rate at which the medication is injected.
- Dispenser. With its help you can adjust the speed of infusion of the drug.
- A transparent rubber tube through which the liquid flows.
- Additional needlewhich should be inserted into the vial of medicine next to the first needle. This is to allow air to flow into the container and thereby allow the liquid to flow out through the tube.
Basic principles and recommendations
To properly put a cat drip at home, you need to follow a few simple rules. It is necessary to ensure the sterility of the needle, hands and the area where the intravenous injection will be given.
The system and the bottle with the drug should be securely fixed at a sufficient height above the level in relation to the cat. It is desirable that two people do the drip, as it is necessary to hold and calm the animal. The drug should be at room temperature. Try not to keep the system unsealed for a long time to keep it sterile.
Assembly of the system
- Open the package.
- Close the roller clip by moving it downward.
- Remove the protective cap from the needle and immediately stick it into the vial of medicine by piercing the rubber stopper. The needle should be inserted all the way in.
- Then you should set the bottle with the drug 30-40 cm above the level of the surface on which the cat is lying. If the bottle with the drug is placed lower, the solution will not flow into the vein or muscle.
- With your thumb and index finger press on the area under the needle. The medicine should fill part of the tube.
- To get the air plug out, you need to open the roller clip until the solution starts to drip from the system.
- The pet is laid on its side.
- The needle is inserted under the skin on the paw, at the withers or at the thigh, where regular injections are made.
- Then you need to unscrew the cap of the catheter and attach the dropper cannula, without the needle.
- Open the clamp and start the installed dropper. The speed of the drug should be no more than 20 drops per minute.
- At the end of the procedure you should screw the roller clamp, disconnect the cannula and close the catheter with the cap. At the end of the procedure, the catheter is flushed with saline solution and secured tightly with a bandage.
Possible errors and complications
After a cat drip, symptoms such as weakness, apathy, lack of appetite and vomiting may occur. Also at the site of injection of the drug, there may be a slight swelling. Such a reaction of the animal's body is considered normal and lasts no more than a day.
If the cat does not drink water, it rises in temperature – you must immediately seek help from the veterinarian.
- The presence of air in the dropper. The system is arranged so that the bubbles will not pass into the vein, but if they are visualized, you need to stop the flow of the drug and let the air out of the tube.
- Lack of antisepsis. Sterility must be maintained during intravenous and intramuscular infusions to avoid sepsis (contamination).
- Incorrect dosage. An insufficient amount, such as an antibiotic, will cause the bacteria to become resistant to the drug, and precious time will be lost. Excessive dosing will negatively affect the liver (at best). Therefore, the amount and volume of medication is set and adjusted only by a veterinarian.
Important! The hair on the area around the infusion is shaved – for sterility and visualization of the injection site.
Follow all the recommendations of the specialist, set the drip as described in the instructions, and then your cat will soon be healthy and energetic again.