Learning how to knit with needles. Knitting schemes with patterns of cats. Things connected with their own hands, for you and your loved ones.
- I knitted a new cat. Teach you and you! Knit.
- KNIT PAWS.
- Tools and fittings
- Crochet cat with a description and schemes
- The easiest kitty
- Waldorf cat by needlepoint
- How to knit a cat by knitting needles for beginners
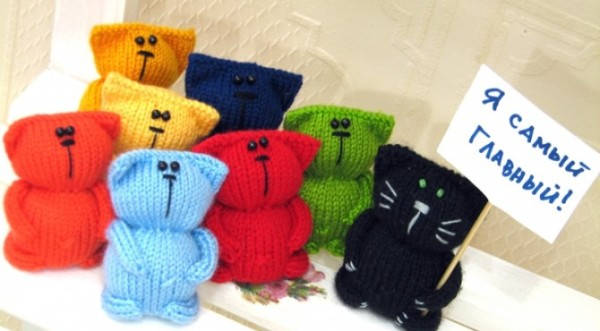
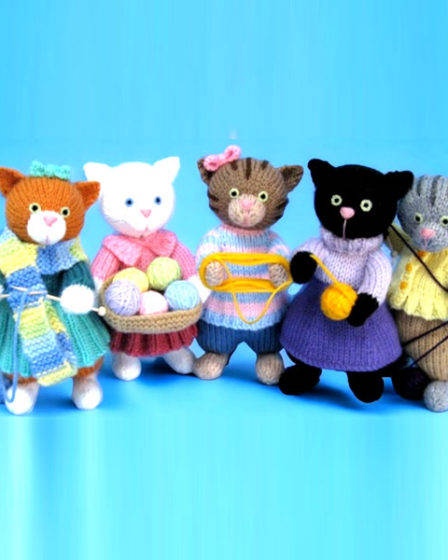
- Knit a cat family from monochrome skeins of leftovers
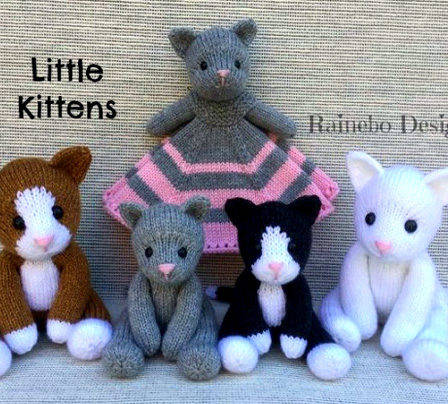
- Little kittens. With needles
- cats with needles
- Authored by
- Cat mascot
- Head and body
- The tail
- Gray Cat in a Beanie
- Head
- Face .
- Ears (make 2)
- Body
- Knitted cat with needles. Description
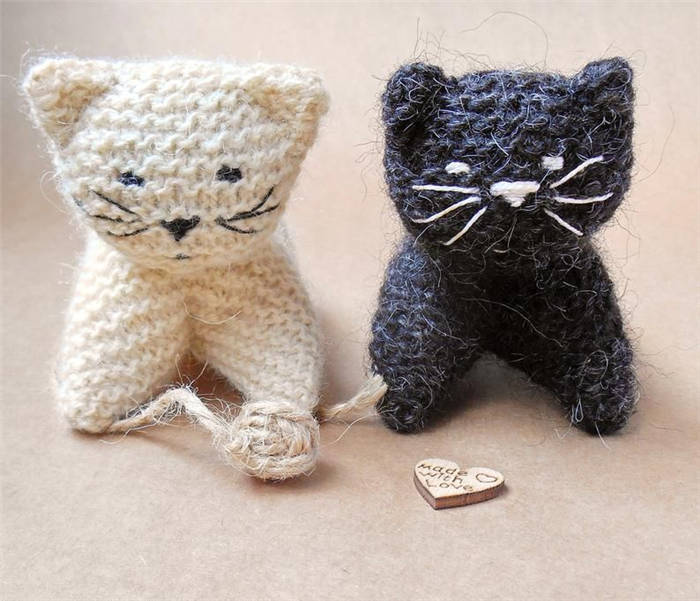
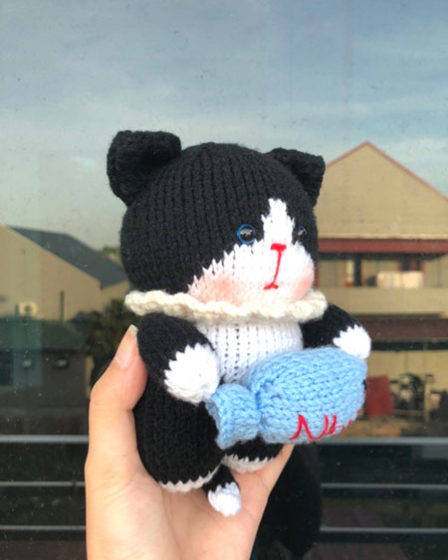
I knitted a new cat. Teach you and you! Knit.
My new foundling is called Barsik after the very cat we met on our Northern trip to the village of Kuzomen on the White Sea, about whom I tell in my article "About Love, Horses, the Desert and the Sea. "
And my Barsik is going to live up north to his prototype house very soon, so I dressed him up in a warm sweater!
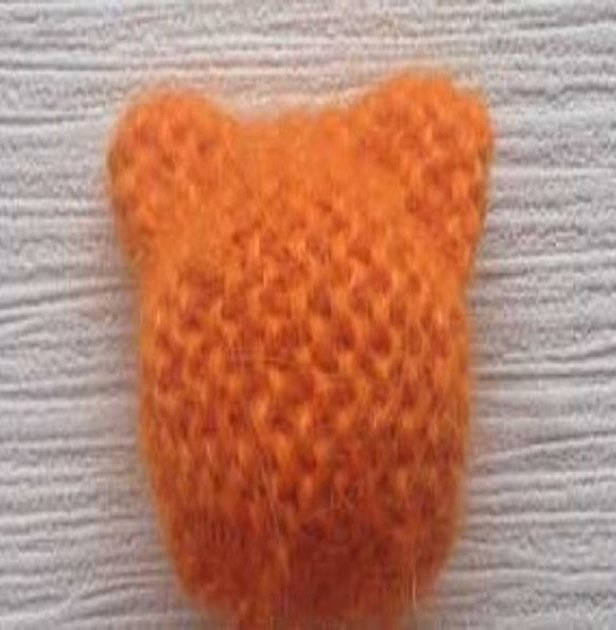
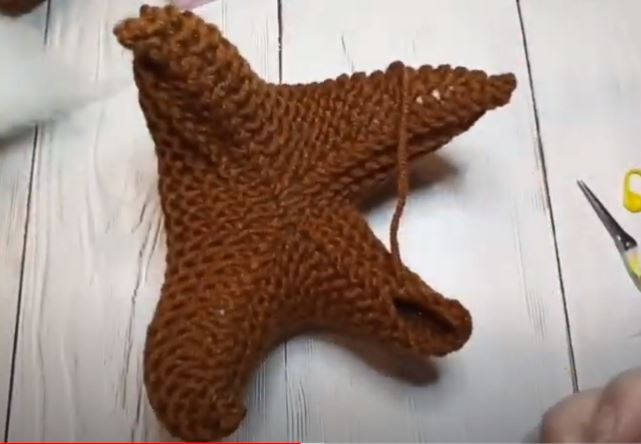
The cats, which I showed you earlier, are knitted more complicated: they have the bottom of the body connected by crochet, the rest by spit, paws and heels and ears are separately knitted. Beautiful, but for many – time-consuming.
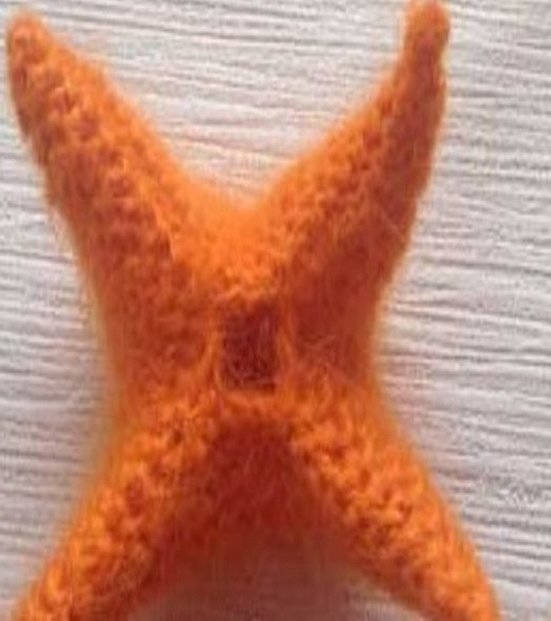
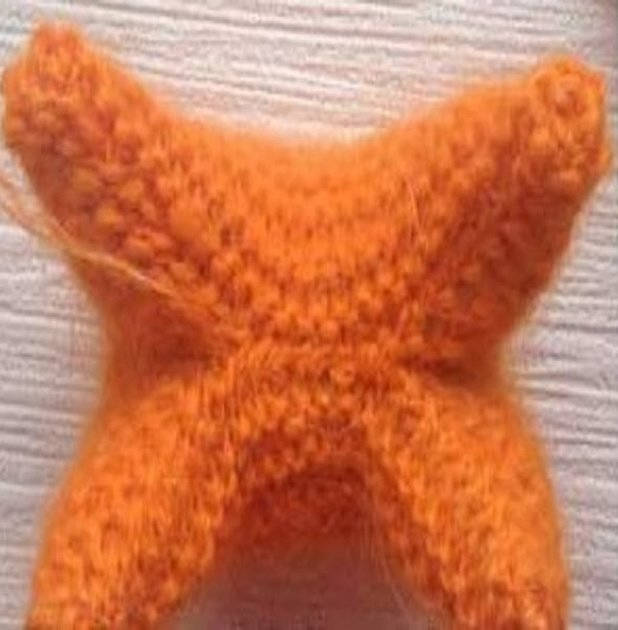
If you look at the carcass of this kitty, you will see that the bottom paws are tied on the principle of the tube with the closure of the toe with loosening loops – that is, there is no bend in the heel. The upper paws are tied with a trumpet with a simple addition and closing of the toe with the loops. and the carcass is just a trumpet! And the ears on it turn out by themselves.
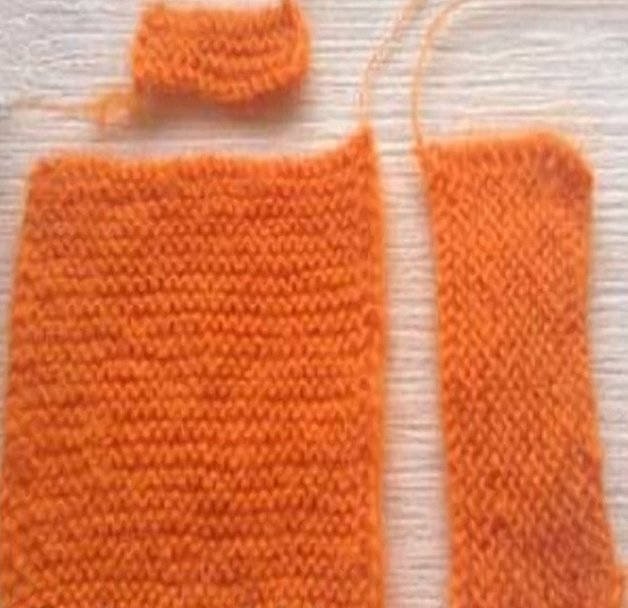
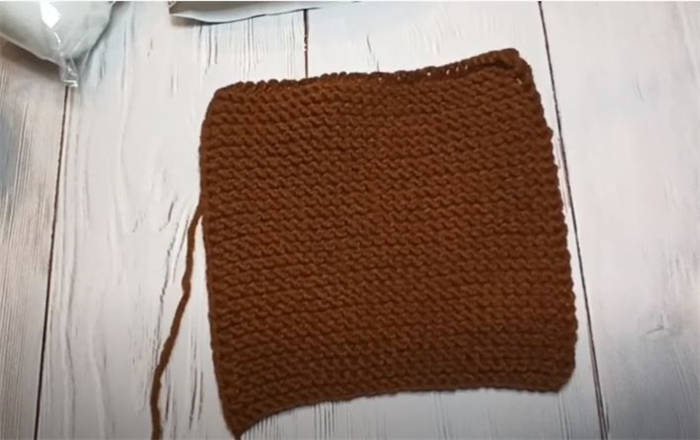
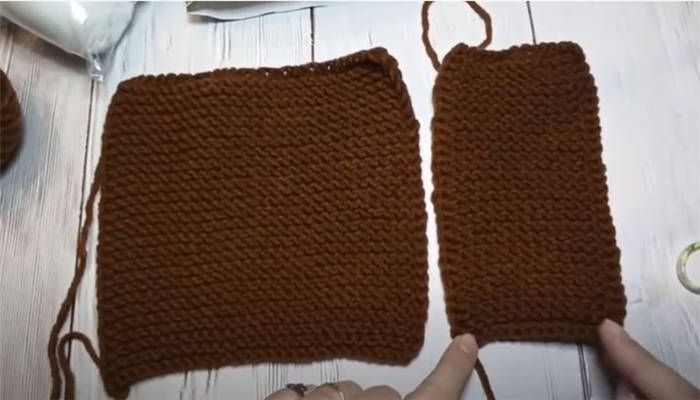
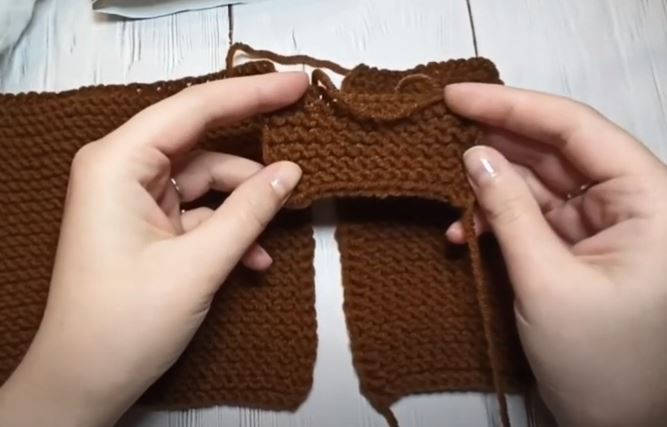
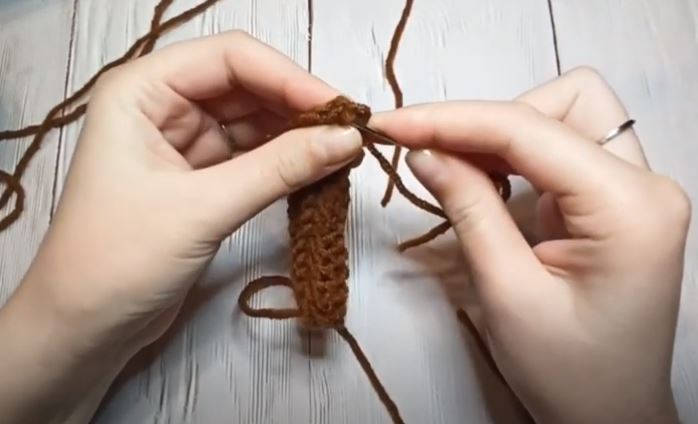
KNIT PAWS.
For the bottom paws I gathered 12 loops on hosiery needles and knitted a tube length of 8 cm. **Then on each needle I cut down a stitch for a total of 8 stitches.
Cut off the tail of the thread 12-15 cm, put it in a blunt needle with a large eye, passed this tail through the remaining loops as knitting, pulled together, took the thread inside out, and, tying knot, proceeded to knit the second paw.
For the upper paws I picked up 16 loops on stocking needles and knitted a pipe 10 cm long. Then on each needle added 1 st from the broach. – A total of 20 stitches. I knitted 1 row.
Then added another 1 st on each spokes. – In total, 24 stitches. I knit 3 rows.
And then I took the potholders – I added 1 st in each row. – There were only 20 stitches left. I knitted 1 row.
I removed 2 stitches in each row – 12 stitches left. I crocheted 1 row.
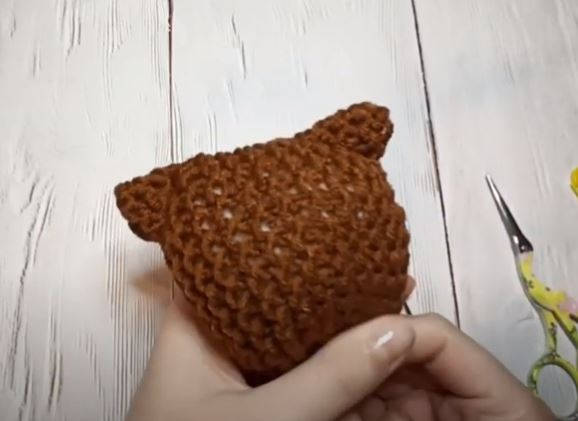
Just a little bit (the yarn is already furry!) I stuffed the paws with synthetic fur, and to make the kitty look like a cat, I used a regular needle and black sewing thread to make the overstretches on the paws of the toes.
The tugs flattened the "paws" of the paws and are well palpable, but not at all visible in the fur of the yarn.
Tools and fittings
The main tools in the work are knitting needles (size should be chosen according to the plan of a particular product). Next you will need yarn, one or more colors. There are different types of needles, such as straight needles, which come in aluminum, wood or plastic. Plastic needles can become brittle if not used for a period of time. Straight knitting needles come in a variety of lengths and sizes. It is helpful to have a range of needle sizes so that they can be changed to get the right tension for a working project. You need to choose a length that will hold the stitches needed for a particular piece, and with which it will be convenient to work.
Experts recommend using only tools and auxiliary parts in the work, which are specified in specific schemes or instructions (MK).
If metal or plastic elements are used, the child can get hurt. Beginner masters need to observe safety techniques when knitting, as well as to use only quality and proven devices, ornaments.
Crochet cat with a description and schemes
Step-by-step plans – drawings or photographs depicting the steps of the master to make a knitted animal. The advantages of this way of making is the clarity.
How to knit a cat with metal or plastic knitting needles, specified in the MC. Experts recommend not to change the scheme and not to make changes in the absence of experience (the finished toy will turn out different).
Knit the product according to the plan provided in order to avoid mistakes. Such instructions are specifically designed to produce a specific outcome. The kitten will turn out even with basic knowledge and skills.
The easiest kitty
A knitted simple kitten by needles will turn out when using a scheme, needles (it is better to take #3), soft yarns containing wool and pile as a filler. It is necessary to do the following.
Make a square of about 14 by 14 centimeters. Apply shawl knitting. You will also need a rectangle of 14 by 7 centimeters and 12 by 11 centimeters.
Then you need to mark the middle of the cloth and roll diagonally. The side should be sewn. And then the same actions to perform for 2, 3 and 4 sides.
Then it is recommended to turn the fabric inside out, fill with filler and sew the remaining part (stomach).
On a smaller rectangle you need to highlight the triangles (ears animal) and stitch them. Then you need to sew the sides together and fill the empty cavity with filler. The remaining hole is sewn up.
Waldorf cat by needlepoint
On the Internet such a toy is called a Waldorf cat. And the muzzle of such a toy is not provided. In the Waldorf education system, children independently invent features of characters' faces, their moods and emotions. This contributes to the development of children's imagination and creativity. Waldorf toys are very simple, but very kind, soft and cozy. They are made from natural materials linen, cotton and use only natural filler, such as sheep's wool. Without a muzzle, such a cat still looks very cute and cuddly. If you wish, you can embroider his nose and mouth, and the eyes can be made of buttons.

Knit best cat volume of woolen, woolen yarn or acrylic. With voluminous yarn creates a denser knitted fabric through which the filler will not be visible. You can use felting wool as a filler.
How to knit a cat by knitting needles for beginners
Choose a smaller size knitting needles so that the holes on the fabric were less noticeable. The toy cat consists of three parts: the body, head and tail. The largest part – the body. The square part measures approximately 14 x 14 cm.
The second part – the head and ears. Rectangle, as half the size of the square part of the body kitty, approximately 14 x 7 cm.
The last detail is the tail. Rectangular part width, as the part for the head of 7 cm and a length of about 2,5-3 cm.
On all parts leave the long threads with which you knit the cloth. They will be useful for stitching. When all parts are ready we start to fold them and sew them.
First we fold in half the tail detail and sew it with a thread, which knit.

Now form the body of the kitten. To do this, use pins or markers to mark the middle of the sides of the square. Fold the square diagonally and stitch from the corner to the designated middle of the two sides. So we got the first paw kitty.
Other legs are formed similarly. In the formation of the body and the feet can be stuffed toy immediately with stuffing. Then the paws of the cat will be pointed and will stick out to the sides. To avoid this, you need to make a few extra stitches in the corners and leave a hole in the center. Through this hole turn the piece on the other side and fill it. Then pull the hole tighter to pull the legs to the center.
Knit a cat family from monochrome skeins of leftovers
Here is a suggestion to knit a whole cat family from monochrome skeins and remnants. This is one of the easiest ways to knit a cat by needles, which will suit beginners. The body and head are knitted in one cloth, the tail and paws are knitted separately and sewn on.
How to knit a kitten by needles for beginners master class
Start knitting the kitten in a circle with stocking needles or circular needles. Take 12 stitches, knit one row, in the second row double the number of stitches, in the third row increase the number of stitches to 30. Knit 32 rows on 30 stitches.
Tail and paws knit separately. For the extremities, sew 6 stitches: for the legs, sew 12 rows, for the tail as many as you want. Sew the tubes together and sew onto the body of the kitten.
To support the kitten, place a small sack with a weighting material on the bottom of the sack. Fill the rest of the space with stuffing: sintepon or sintepuch.
Fold the top in half and sew it. Corners of the stitching thread obliquely, thus forming ears.
We just need to make a muzzle and give him a poster in his paws. What to write on the poster, think of your own.
If anything is unclear, then watch this video: How to knit a kitten for beginners master class Part 1
Little kittens. With needles
 Alberta Orlova
 Natalia Kuzina
 Stanislav Semyonov
 Yulia Ibrayeva
Needlewomen around the world are not seriously into knitting toys. In this kind of needlework there are no limits.
On this site you will find free patterns, manuals and master classes on knitting toys with hooks and needles. Have a nice walk on the pages of the site!
cats with needles
Guide to crochet a redheaded cat Lovelace in the shape of a heart Charming redheaded gentleman dreamily squinting and purring with pleasure. And no wonder, because not far off the favorite feline month of March, when you can spend the nights recklessly racing on the rooftops with the lady of the heart.
Authored by
- Alberta Orlova
- Natalia Kuzina
- Stanislav Semyonov
- Yulia Ibrayeva
Needlewomen around the world are really keen on knitting toys. In this kind of needlework there are no limits.
On this site you will find free patterns, manuals and master classes on knitting toys with hooks and needles. Have a nice walk on the pages of the site!
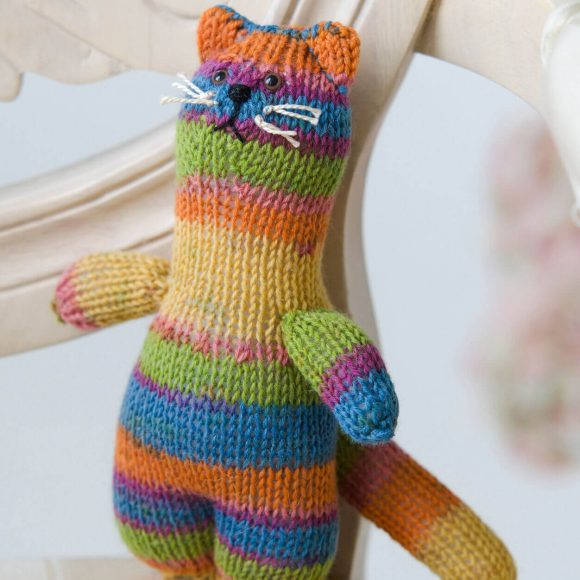
Cat mascot
Such a Striped Cat can be knitted as a gift for a child, or as a talisman for good luck. You can take the yarn, as in the description, but it is not necessary. You may use any yarn, but if you choose the thickness, as in the description – the size of the cat will be = 7 inches (18 cm).
Head and body
We start with the body, that is, from the bottom. We knit in a circular pattern on 4 needles, one at work. If you find it difficult to knit in a loop – knit on two spokes, at the end of the work will need to sew all the parts with a knit stitch.
We will dial on the needles of thickness 3.5 mm. 20 loops.
1st row: 20 faces.
2nd st: faces.
Row 3: in this row we have to make 20 additions, that is *1 person of one st. – 2 stitches behind the front and back walls* – repeat 20 times:
We got 40 stitches.
Continue without any deletions or additions in the straight stitching up to row 30.
31st st: add 13 stitches: *1 face, 2 consecutive sts – repeat until the end of the row. The remainder – 27 stitches.
From the 32nd to the 46th strokes. – Continue without deletions over stitching.
Head.
47th p: 2 random additions (27+2) = 29 sts.
Rows 48, 50, 52 – without additions.
49th p: with additions: 13 faces, * additions (see animation), 1 face * – repeat 2 times, 12 faces. = 31 stitches.
51st: 14 persons, * add (see animation), 1 person * – repeat 2 times, 13 persons = 33 stitches.
53rd: 15 faces, * add (see animation), 1 person * – repeat 2 times, 14 faces = 35 stitches.
54-56 r: without the loss.
Next, we begin to subtract.
57th: 15 persons, *2 vm. persons, 1 person * – repeat 2 times, 14 persons = 33 stitches.
58th: 14 faces, *2 Vm. persons, 1 person * – repeat twice, 13 persons = 31.
59th: 13 faces, *2 "vm" faces, 1 person* – repeat twice, 12 faces = 29.
60th: 12 faces, *2 Vm. persons, 1 person* – repeat twice, 11 persons = 27.
61-64 p.: knit without cuts and close all stitches.
The tail
Take on 6 loops. Perform 2 rows of silhouette.
3 rd: make 6 additions (see animation) = 12 stitches.
R4-34: do not take in stitches and close all stitches.
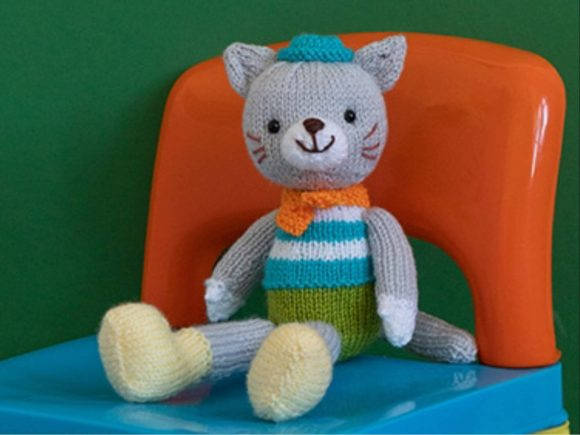
Gray Cat in a Beanie
This gray cat is 30 cm tall. Yarn used: Paintbox Yarns Simply DK (100% acrylic, 100g per 276m).
Knit parts on two needles in twisting rows, at the end of the work we sew with a knit stitch.
Head
1st p: all wrong.
2nd p: 10 additions (see animation) = 20 sts.
3rd and every row of the wrong side – all stitches.
4th: *1 face, add * – repeat 10 times = 30 sts.
6-й: * 2 faces, add.* – repeat 10 times = 40 sts.
8-й: * 3 faces, add in * – repeat 10 times = 50 sts.
9th to 25th st: starting from the back of the row, sew 17 straight stitches.
26th st: *3 persons, 2 consecutive times * – repeat 10 times = 40 sts.
28-й: *2 faces, 2 VMs* – 10 times = 30 sts.
30-й: *1 face, 2 BM* – 10 times = 20 sts.
32nd: (2 volts) – 10 times = 10 sts.
Tighten all 10 sts, fasten tightly, cut the thread.
Face .
Yarn B) gather 12 sts.
1 st st.: Nil.
2nd: 12 stitches (See animation) = 24 sts.
From 3-7 p: starting from the back of the row, sew 5 pars in a straight stitch.
Close all sts.
Ears (make 2)
With yarn A), gather 20 sts.
Rows 1-3: starting from the wrong side of the line, sew 3 paces in a straight line.
4th st: *2 faces, 2 BM* – repeat 5 times = 15 sts.
5th: the wrong side.
6-й: *1 face, 2 BM* – 5 times = 10 sts.
7th: sleeves.
All stitches are pulled together and fastened.
Body
Yarn E) gather 10 sts.
1st p: all hems.
2nd p: 10 additions (see animation) = 20 sts.
3rd and every row of the wrong side – all sts.
4th: *1 face, add * – repeat 10 times = 30 sts.
6-й: * 2 faces, add.* – repeat 10 times = 40 sts.
Rows 7-21: starting from the back, sew 15 rows in a straight line. Change to yarn D).
Rows 22-27: follow the pattern with a few straight stitches.
Change to B).
Rows 28-29: face smooth.
Row 30: *2 persons, 2 sts* – 10 times = 30 sts.
31st p: N.
Change to yarn D).
Rows 32-35: starting from the face side, continue 4 rows of straight stitch.
Change to yarn B).
Rows 36-37: face smooth.
38th st: *3 persons, 2 sts* – 6 times = 24 sts.
39-nd: sleeves.
Change to yarn D).
40-43 rows: 4 sts. face smooth. Take off st. on the cast-off yarn. Postpone the part.
Knitted cat with needles. Description
To make the work you will need: yarn (50% mohair, 50% polyacrylic; 150 m/50 g) – 100 g of black and 50 g of white. Embroidery needle with rounded end, 5 needles #3.5, synthetic absorbent cotton for filling, a little pink cotton yarn, 45 cm of red taffeta ribbon, 2 buttons for the eyes, plastic mustache. Knitting density: 23 sts. x 33 sts. = 10 x 10 cm.
Knitted cat (knit with needlepoint) catSize: length approx. 45 cm. Magazine "Sandra" # 4 g
To make the work you will need: yarn (50% mohair, 50% polyacrylic; 150 m/50 g) – 100 g of black and 50 g of white. Embroidery needle with rounded end, 5 needles #3,5, absorbent cotton for filling, a little pink cotton yarn, 45 cm of red taffeta ribbon, 2 buttons for eyes, plastic mustache. Knitting density: 23 sts. x 33 sts. = 10 x 10 cm.
Torso: start at the back end. Dial 20 sts of black yarn and knit in a circle with a straight face. In the 8th rt. In the 46th, 56th, 65th, and 71st st. evenly add 10 st. = 28 p. After 76 p. close the remaining stitches and pull down slightly with working thread.
Tail: Start at front end. Dial in 24 stitches with black thread and knit in a circular pattern. The transition from one row to the next is at the top in the middle. On the 30th, 50th and 60th strokes knit 2 stitches together with bend to the left (the penultimate stitch is taken off as a single stitch, next stitch must be left untied and pulled through) and at the beginning of the line knit 2 stitches together as single stitch = 18 stitches. 70 stitches were knitted with working thread.
Head: Start with a muzzle. Take 30 stitches with white yarn in 2 yarns and knit on a circle in a straight line. Transition from one row to another is in the middle of the bottom. After 10 white rows, knit with black yarn in 1 yarn, adding 10 sts evenly in the 3rd, 5th and 7th rows = 60 sts. After 15 black rows leave the bottom middle 10 sts on the memory spokes and continue working in the forward and reverse directions, while on both sides of the 10 sts in every 2 sts transfer to the memory spokes 5 more times for 2 sts. Then do 1 st in a circle on all loops, knitting 2 sts together = 30 st. Close the loops. 15 stitches in the middle of the bottom line with white yarn in 2 threads and knit bib by crochet, 6 times on both sides in every 2 stitches to remove 1 stitch, then close the remaining 3 stitches.