Modeling balls should stretch well and not tear when twisted. Their quality determines whether or not you end up with a toy. Unfortunately, most of what is presented in the shelves, for modeling is poorly suited. If you are not sure of the quality of the balloon, do not inflate it too much. Leave about 15 centimeters, not 10, as recommended by professionals.
- Modeling a cat from papier-mâché paste
- How to make a balloon cat
- How to make a cat out of a balloon (sausage)?
- The next step
- The final step
- Types of curling ball sausages
- Simple .
- With a lock.
- With a kink.
- Figures of animals from long balloons – simple master classes for beginners
- Dog
- Cat
- How to make a cartoon character 3 cats from balloons with your own hands?
Modeling a cat from papier-mâché paste
Tie the tail on a strong knot so that the balloon will not deflate. The diameter of the balloon will be equal to the size of the cat.
Sprinkle the table with starch, tear off a piece of mass, dip it in starch and knead well.
I advise you to use starch, not flour, because it makes the mass pliable and very pleasant to the touch.
The joints are smoothed out and smoothed well. You can roll the ball on the table to level the surface better.
After the whole ball is covered with the mass, hang it by the tail to dry. I make a hole in the tail, insert a hook and hang it on a clothes dryer. Unfortunately, I did not take a picture of this moment, but I think I explained it clearly enough.
My balloon dried overnight. We puncture the balloon and take it out of the papier-mache balloon.
From foil we make blanks for eyes, muzzle, nose, ears, tail and paws. To make the surface flat, press the foil pieces against a flat surface, such as a table.
Using a hot gun, glue all the foil pieces to the ball. In principle, you can skip this step, because the glue holds very poorly and at the slightest effort blanks stick out, but I did this step rather for the correct placement of all the elements. Look, try it on, and if you like everything, then start gluing with paste. Note that the mass remains paper-like after drying, that is, it does not crumble or crack, and can be easily cut with scissors as usual thick cardboard.
Please note that the mass when dry is paper, that is, do not crumble and do not crack, and easily cut with scissors as usual thick cardboard.
For the mass to stick well, moisten glued parts with water. Align with a wet brush and wet hands.
Note that my mass was made about 10 days ago, and I do not recommend storing the mass for so long. It gets kind of loose, and it's hard to level and smooth it out. Later I will work with fresh mass, and the difference will be evident. The surface will be smooth, even, and with the mass I feel much more pleasant and easier to work with. So, try to use such papier-mache mass for a week at most.
How to make a balloon cat
Thanks to these videos, everyone can learn how to make adorable cats, both domestic and wild, from ordinary balloons.
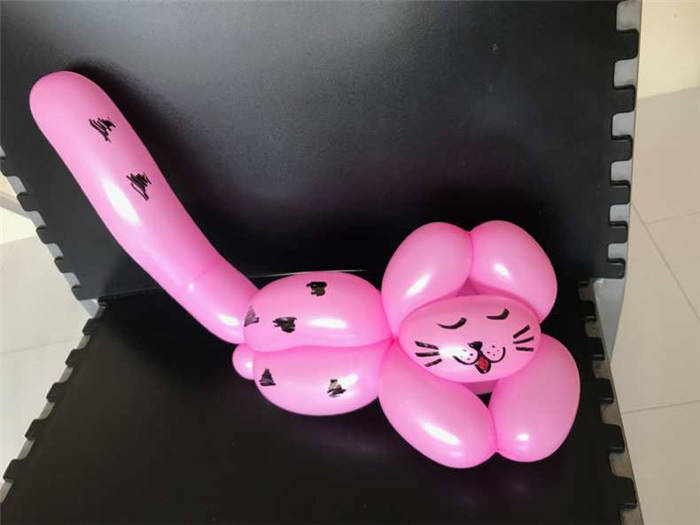
How to make a cat from a long balloon
A video on how to make a cat out of a long balloon. The biggest challenge of this figurine is to .
One Balloon Animal Cat DIY TUTORIAL como hacer un gatito con globos
Hi friends, let's make a cat https://youtu.be/EJxHy_WW0AQ from one long balloon balloon .
One Balloon Animal Cat DIY TUTORIAL como hacer un gatito con globos
Hi friends, today we are making a cute cat https://youtu.be/zpeGqwdRV0Q from one long balloon balloon .
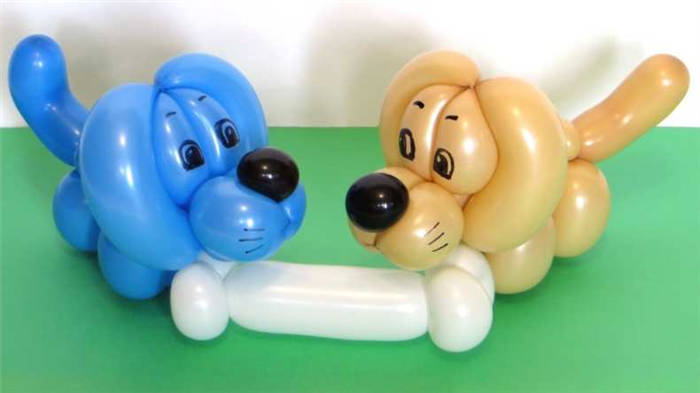
Balloon doggie. How to make a dog out of balloons
How to make a balloon doggie A balloon doggie is the most cherished thing a person would like to learn how to make with their own .
Balloon Bunny DIY TUTORIAL como hacer un conejo con globos
Hi friends, today we are making a bunny https://youtu.be/wNIGW-K402w out of balloons with our own hands. Have a nice and .
How to make a cat out of a balloon (sausage)?
In order to make a cat out of balloons (balloons-balls or CFM) you can watch the video master class, which turned out a wonderful "air" cat:
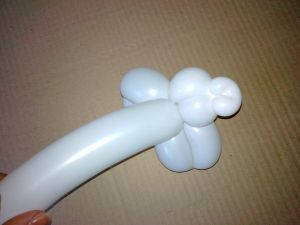
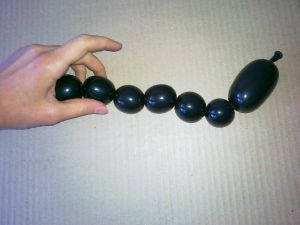
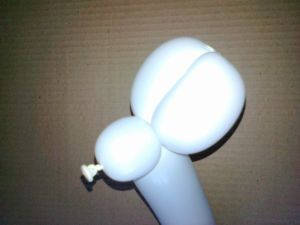
You can also make a cat out of balloons using the following step-by-step master class.
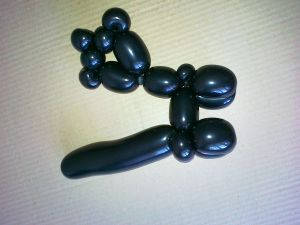
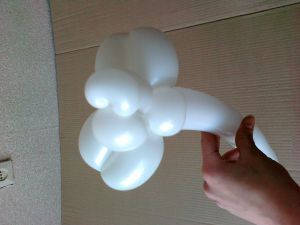
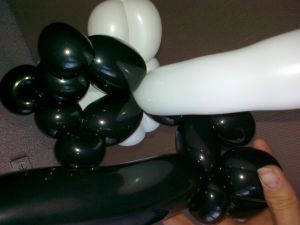
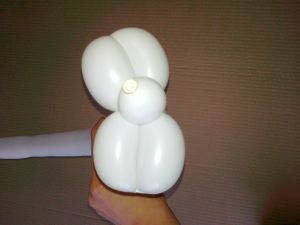
Here already have the outlines of a cat, but it still needs to make a muzzle. To do this, take a white ball and start twisting it:

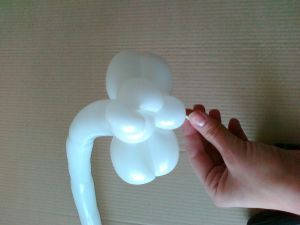
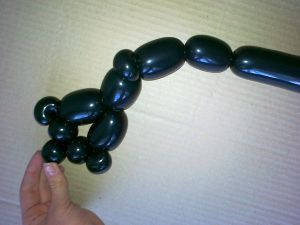
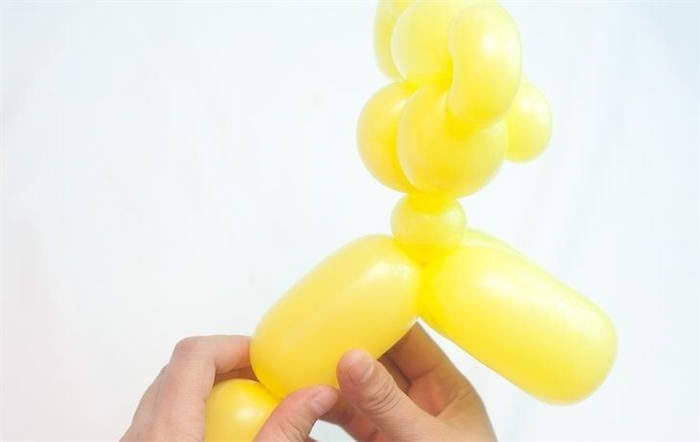
The next step
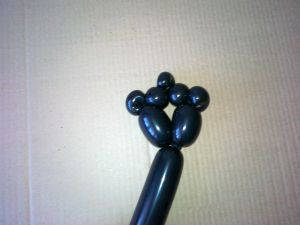
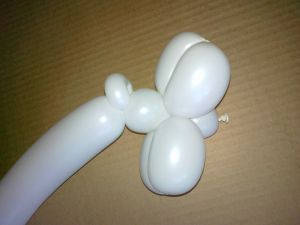
Then you need to take care of making the head. To do this, make two small balls of the same diameter on the end. The main thing is to twist well. It is best to make ten twists. This is the most reliable figure, which will not let your bubbles untwist at the most responsible moment. Then make two more smaller bubbles and twist the whole chain into a flower. You will have a middle flower with petals. Insert the muzzle through the resulting hole. Make a small bubble for the neck.
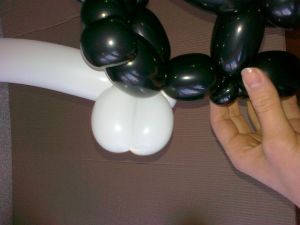
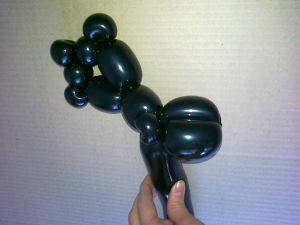
The final step
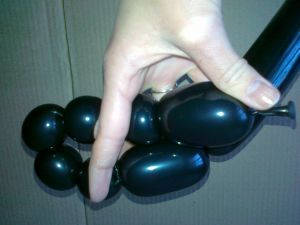
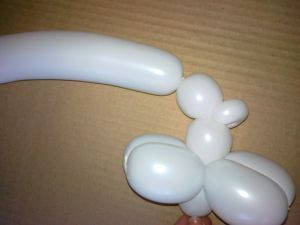
Next, you need to make the legs. Measure out ten centimeters on the ball and twist ten times, as in previous times, for strength. Cat legs are ready. Next you need to make a paw. To do this, the third part of the leg twist and fasten. Carry out a similar manipulation to create the second leg. Then both legs down, where they belong. We made front legs.
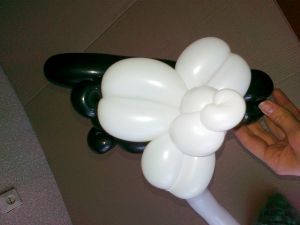
Now measure ten centimeters for the body, fix it like I told you before and make hind legs. The idea is the same as for the front legs. Twist the right length, measure feet with claws, fasten. The remainder of the ball – right – use as a tail. That's it. The balloon cat is ready. If you filled it with helium, then feel free to tie it to a string or ribbon and give it to your child.
If you are making this craft with children, warn them that the balloon must be handled very carefully. Most often, children are not yet in control of their power at the proper level and can spoil the whole thing at the initial stage and will be very upset. And we do not need extra tears at the party. So always remind children of the accuracy and caution, and all will be happy. Adults in this time can do their business and have a quiet talk without the children's noise.
Types of curling ball sausages
The manufacturing material (latex) and color palette (from pastels and satin to metallic and mother-of-pearl) are not the only means to give special expressiveness to compositions and figures. Creating beautiful pieces is helped by the use of different techniques.
Tip ! Most twisting guides describe 1-2 techniques, the simplest ones. You can practice making them beforehand in order to develop habitual automatism. And then choose simple schemes to perform, practicing more complex movements in parallel.
Simple .
In the usual technique – on the ball, a jumper is made at a given distance (wrap 3-4 times clockwise to get a bubble of small size).
With a lock.
There are two options, difficult not only in description, but also in execution. However, after being performed by a knowledgeable person and a visual demonstration, it turns out to be simple.
Lock #1 (3 bubbles, obtained by simple twisting: two extreme ones are folded and connected to the third one) and lock #2, more complicated, in the third ball an additional bend is made. For clarity, you can watch a video:
With a kink.
This twisting with a twist involves using three sequentially made latex bubbles, folded, and then one of them is twisted and twisted. For beginners – video from the master:
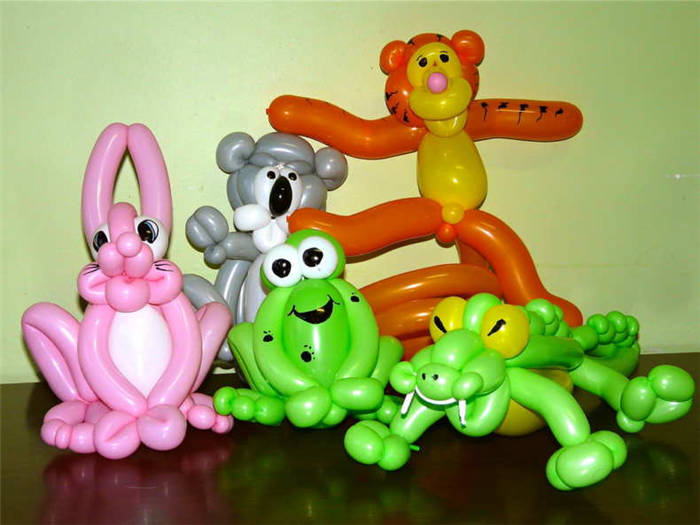
Figures of animals from long balloons – simple master classes for beginners
A simple and symbolic figure, created by a fan of aerodesign in his particular direction – not only a way to creatively congratulate a loved one, but also an opportunity to subsequently earn by decorating banquet halls, stages, wedding arches and other places where you need to create a festive mood.
A composition made by a child is an invaluable opportunity to develop fine motor skills, imagination, and clinging fingers. For adults, it can be part of the rehabilitation phase after a stroke or injury.
Dog
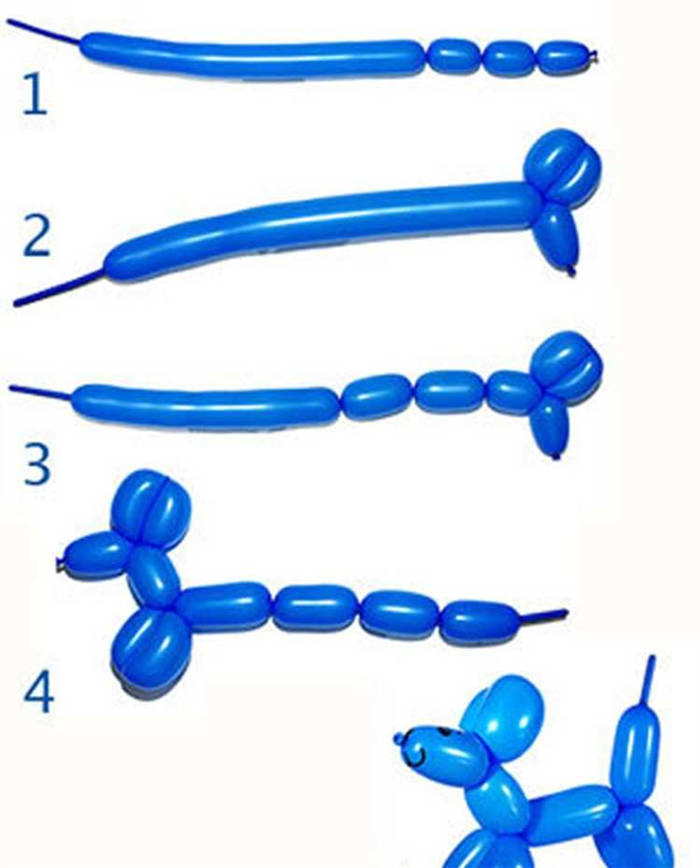
You need 1 ball, 5 cm in diameter and 1.5 m long. The doggy can be made by keeping the specified distance between the bubbles (5 cm, 2 cm, 1 cm, 2 cm). 1 and 4 bubbles are fixed with a lock. Further on the video detailed instructions:
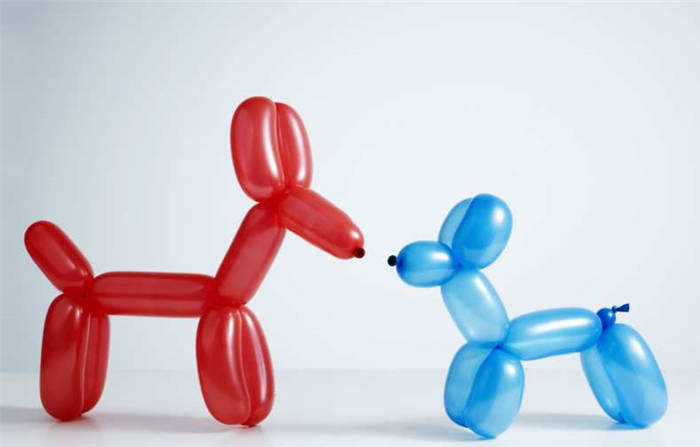
Sausage ball dogs are of different kinds, the most common modification is a poodle. You can make a fun puppy.
Cat
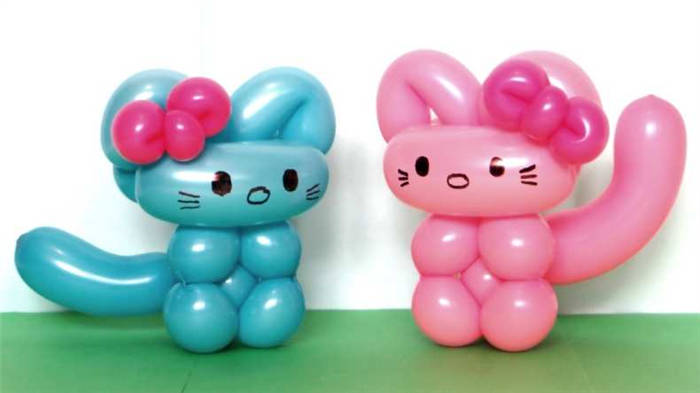
There are several different options: cat and kitty, from one or two balloons. In the video lesson for beginners – the simplest cat from one balloon:
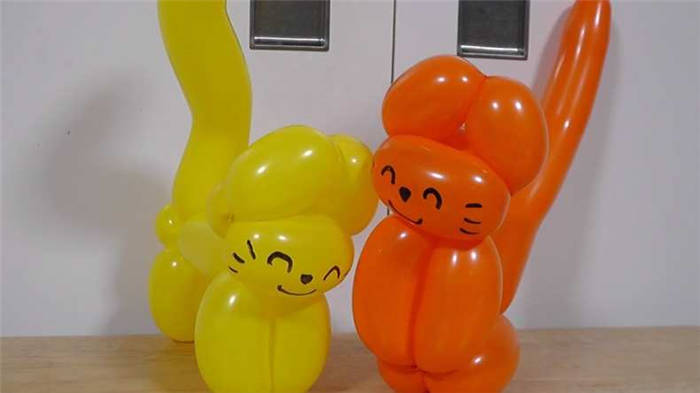
How to make a cartoon character 3 cats from balloons with your own hands?
How to make a cartoon character "Three cats" from balloons with your own hands? In this master class we will show how you can create a cute character Korzhik from ordinary balloons.
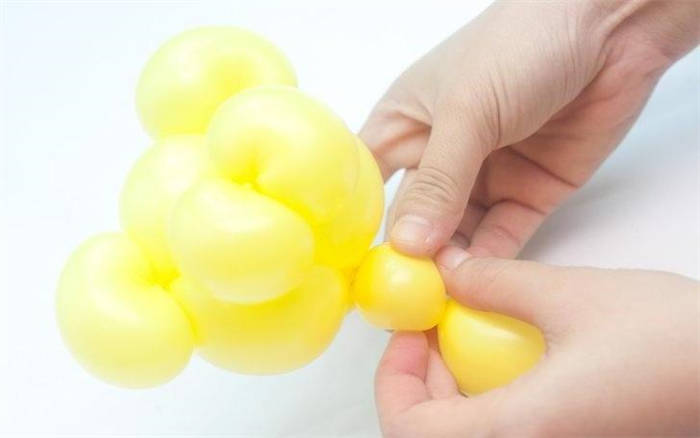
1. We make a stand, on which we will place Korzhik. Take four 12-inch green balloons.
2. Inflate the balloons with an air pump: make ten strokes. Tie up the loose ends of the balloons with knots to keep the air in.
3. Connect two balloons in two pairs by tying the free ends together.
4. We twist pairs of balls with each other to get four balls together.
5. Take a 12ʺ green ball and pour some water into it to make a weight. Tie it to the four connected green balls.
6. Taking four more 12-inch balloons, inflate them with air pumps, making eight strokes each.
7. Connect two of each balloon into pairs, then twist the pairs together.
8. Place the second four balloons on top of the first, so that they are between the balls of the first level.
10. Inflate a 12-inch orange balloon. Tie the free end of the balloon with a knot.
11. Execute tying. Cut the orange balloon into sections and tie off each section with a small knot.
12. With three balls of orange balloon 2DM-260 cut off the tops with scissors.
13. On top of an inflated 12-inch orange balloon we put a knot and twist the latex around it. The knot should be inside a small pouch. Tie around the bag with a ball of XDM-260, which previously cut off the tip. Make a few turns, and then make a knot.
14. Make an attachment for the ears: they will be located on the sides of the first attachment and slightly lower. Determine four points on the same line – two for each ear. Make the marks.
15. Inflate the orange balloon with an orange balloon, not all the way to the end. Tie the free end with a knot.