30. With my fingers I gently squeeze the workpiece to give it the shape of a voluminous cat's ear.
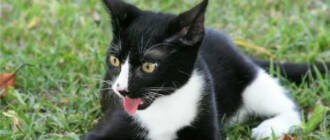
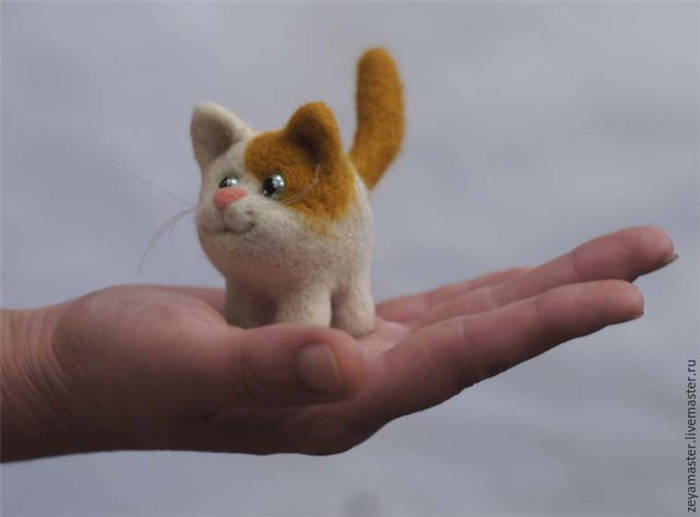
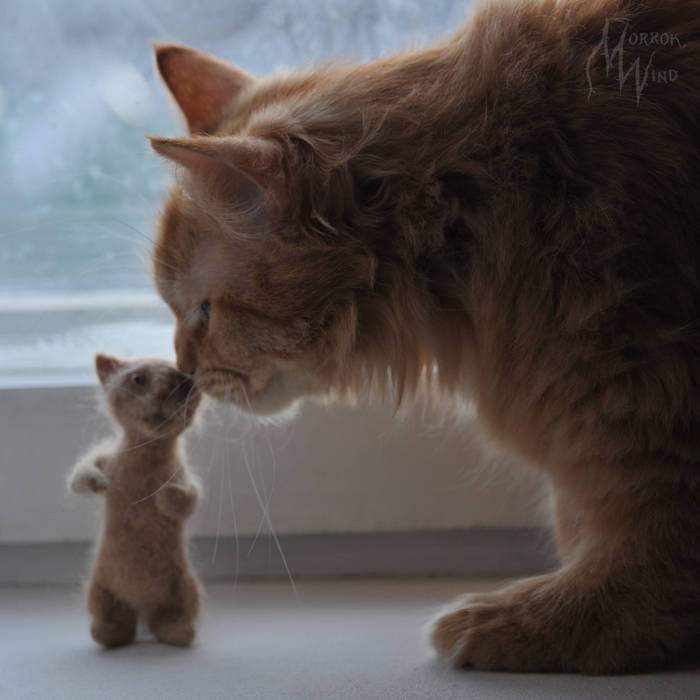
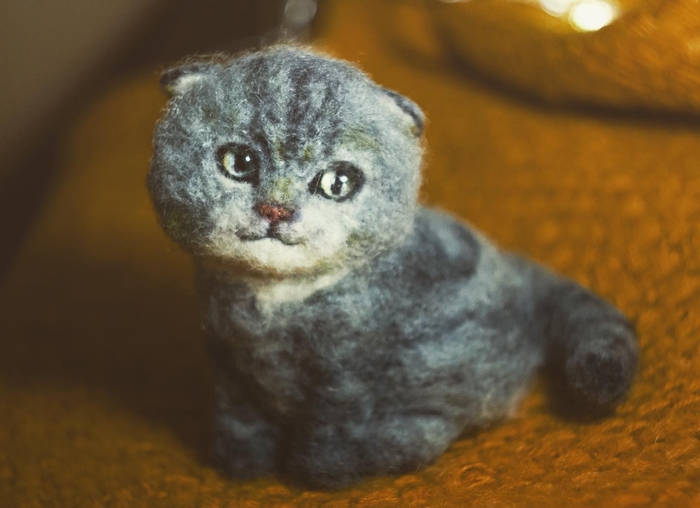
- "Pussycat is just like a live one!" – So say my readers. I tell you how to make such a miracle from scratch, even for a beginner.
- How to make a toy out of cat fur
- Felting cat fur crafts for beginners by hand
- Master class: sad cat Senecka in dry felting
- Restless cats, or Felting a cute little cat and his friends
- A cat from the cat fur
- How to make a toy out of cat fur
- Almost living wool cat. Simple mk with photos.
- CotoCrocus
- Nice felting kitten.
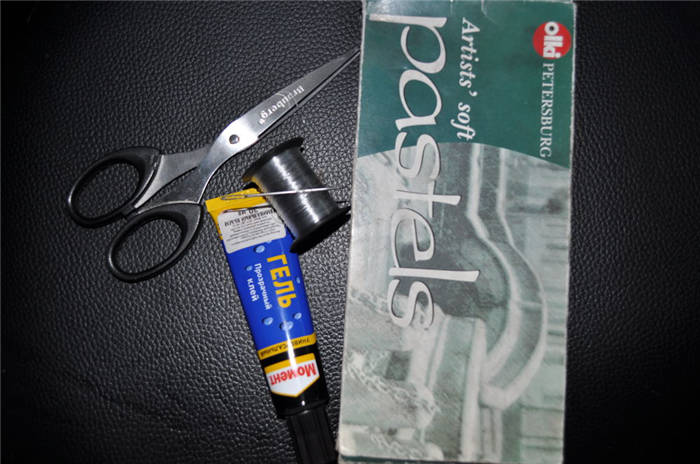
- For felting a cat will need:
- Master class on felting a kitten.
- Felting the main parts
"Pussycat is just like a live one!" – So say my readers. I tell you how to make such a miracle from scratch, even for a beginner.
The most difficult task for any craftsman is a portrait. Painting, modeling or felting flowers, decorations and other characters is always much easier than making a similar copy from a living prototype.
In one of my posts I promised you that I would definitely publish a lesson on how to felting a realistic cat. I am keeping my promise.
By the way, I recommend that you save this publication by sharing it on social media so you don't lose it. More detailed and rich free tutorials on felting in wool I have not yet seen on the web. I, as always, tried to collect for you all the most valuable and important.
If you don't felting yet, don't be sad, my master class is designed not only for experienced masters, but also for those who just want to learn a new kind of creativity – dry felting. Let's go!
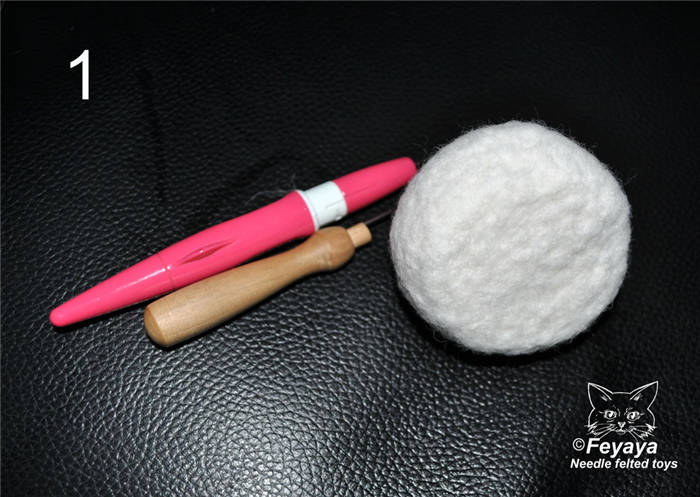
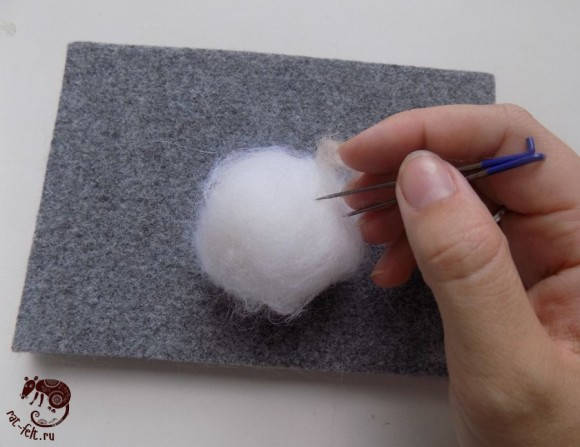
I use white carded wool of 27-32 microns and a needle 36 with a triangular section.
2. I form a volume oval of wool and fix it with a needle. You need to drive the needle as deeply as possible to felts the base of the workpiece, it must be very dense, while the outside should be loose, so you can connect the parts.
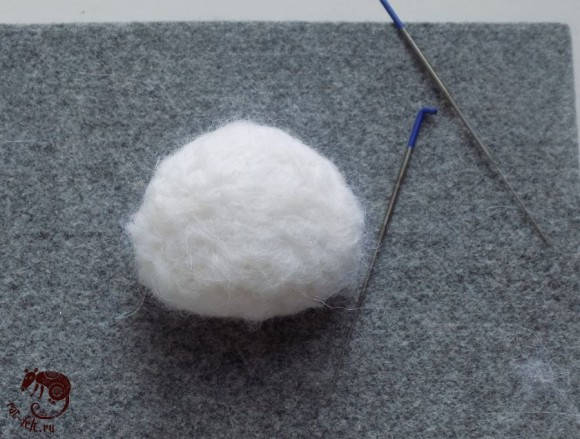
Now I felting a ball. Its size should be three times smaller than the oval. Similarly to the body, the workpiece should be dense inside and have a little loose structure outside.
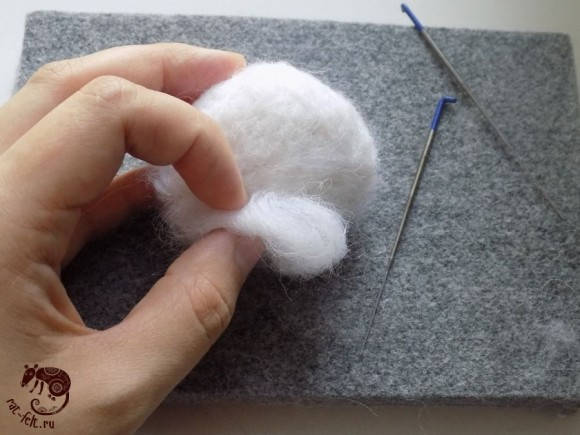
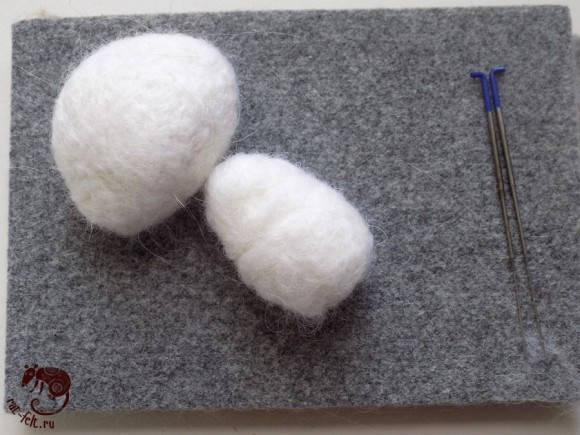
4. Connect the body and head. The ball and the body should be about 45 degrees with respect to each other (see picture). I use extra tufts of wool for joining. I put them along the connecting line between the head and the torso and stick them with a needle. The head and torso must be tightly pressed together, so as not to get a "goose neck".
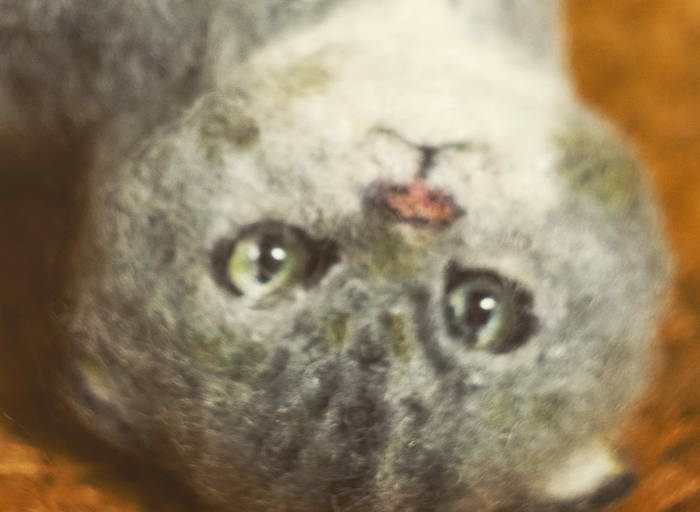
5. Using a needle makes serifs vertically and horizontally – I find the center of our muzzle.
How to make a toy out of cat fur
There are many ways to make a toy out of cat fur. Consider a way to make a kitten with real wool.
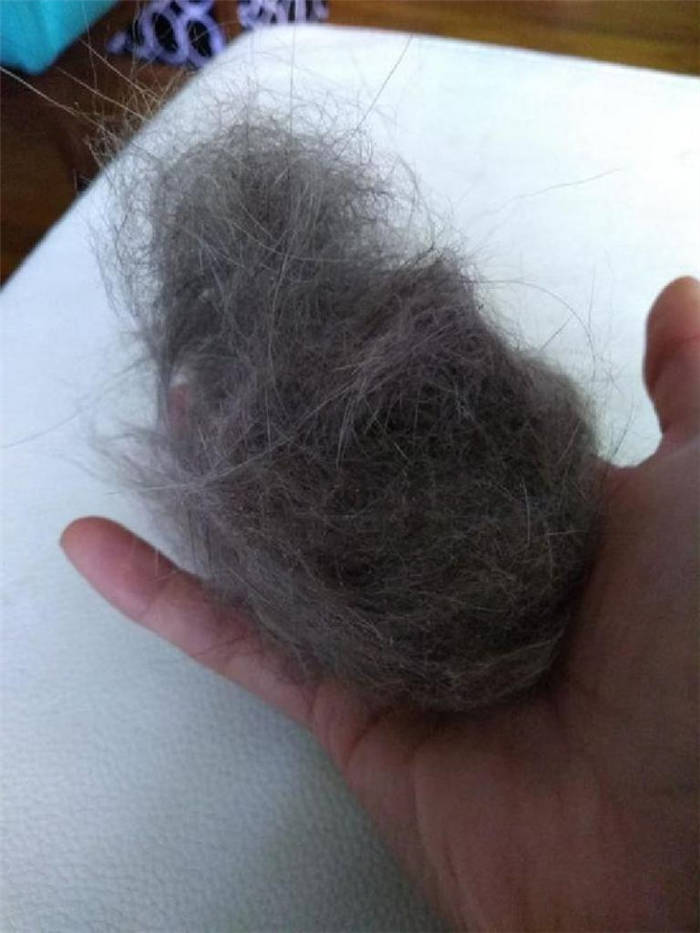
- Collect wool. For this toy it will be necessary to collect a scrap of wool about the size of the palm.
- Take a small part of it, roll it into a ball. This future torso kitten. Put the ball on a sponge or styrofoam and pierce it with a needle on all sides until it is tight.
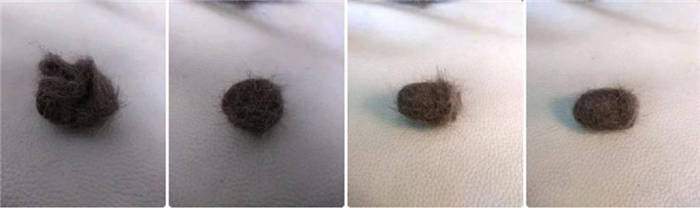
- Wet the workpiece with water, soap up, roll it between your hands and rinse. Send it to dry in a warm place (preferably near a radiator, but not on the heat source). Then roll the kitten's head in the same way.
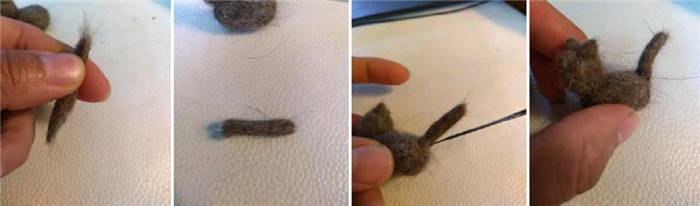
- When the parts are dry, assemble the torso and head into one figure and pierce with a needle where they join.
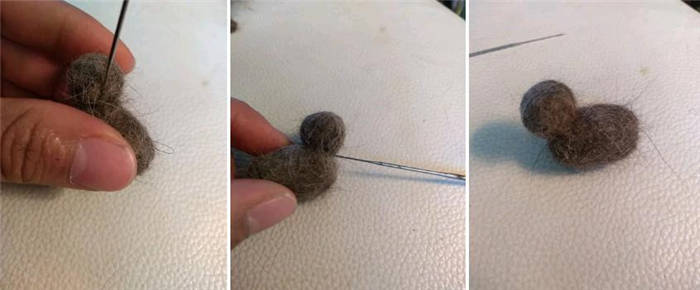
- Next come the ears and tail.
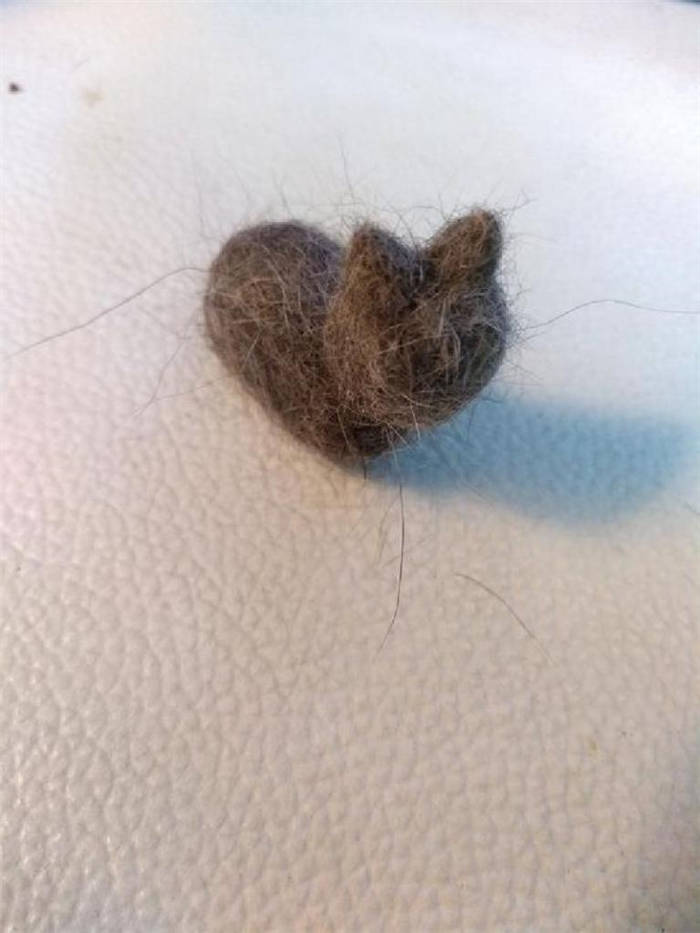
- To give the tail curve, you need to fold it several times and pierce the place of fold with a needle.
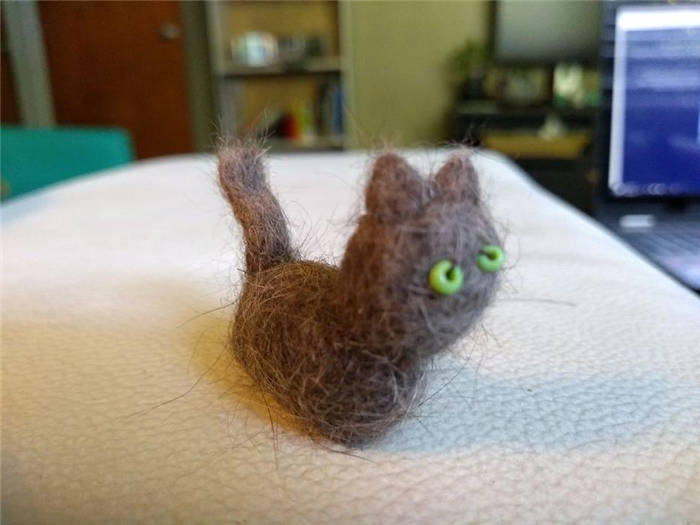
- Sew the kitten eyes (you can use beads or buttons). A cute copy of the pet is ready!
Felting cat fur crafts for beginners by hand
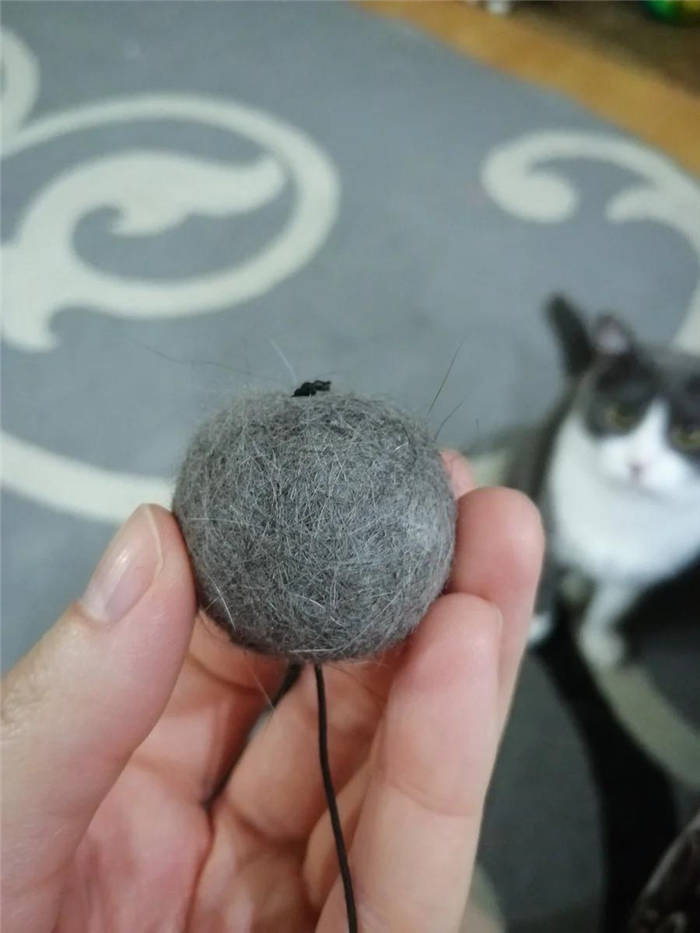
With a cat hair craft, you can not only master the technique, but also thank the pet for its contribution to the process. We are talking about a toy for the cat. Cats love when things have their scent and are more likely to pay attention to them.
- Collect a small bag of wool.
- Take a piece and moisten it with water, for example from a sprayer.
- Roll the lump between your palms until it has thickened.
- Add a bit more wool, moisten and continue rolling. Repeat until you get the desired size.
- Allow to dry.
- Use a needle to pass a string or rubber band through the ball.
- The toy for the cat is ready!
Master class: sad cat Senecka in dry felting
A sad cat Seneca (simplified) in the technique of dry felting.
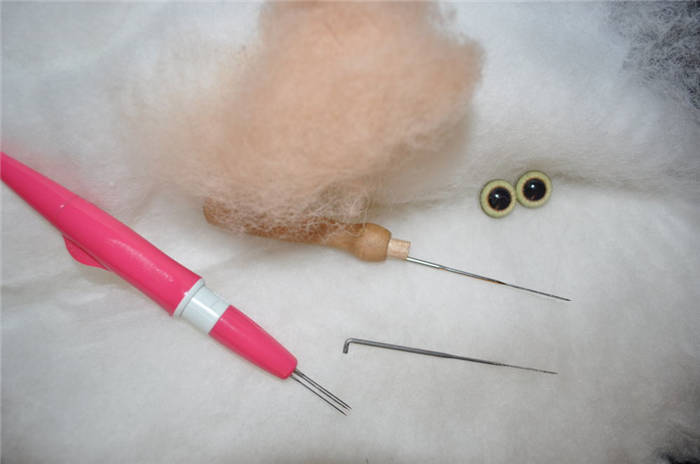
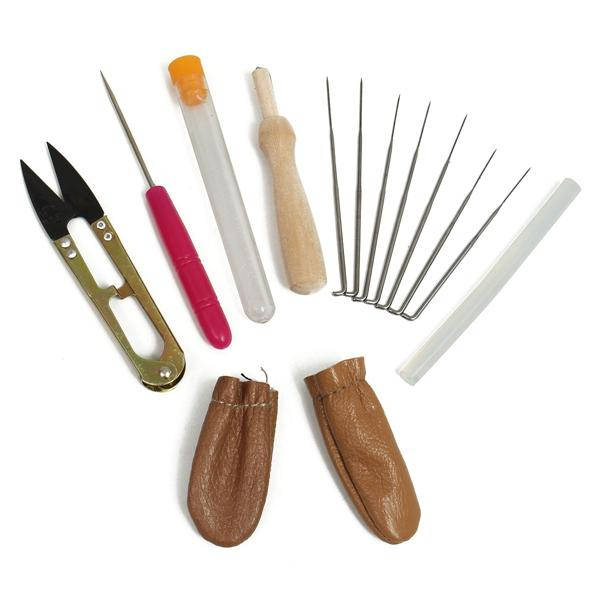
Materials we will need:
1 Cardochese (you can use combed ribbon, but I do not recommend it, it is very inconvenient to work with it in this case), you can use any shades of wool, I took white for the base.
2 Needles (take the standard simple set, which I often use, and which is suitable for this type of work) #36, #38, reverse needle, felting brush.
I apologize in advance for the different backgrounds, time, as always, is not enough, so, had to felting and shoot at different times of day with different lighting (his little studio has not yet).
Photo 1. Felt a regular ball with needle 36 (the ball should correspond to the proportions of your size of eyes, the size of the toy will depend on this, the needle is introduced deep enough and perpendicular to the surface, felting until you feel that inside the ball formed some hardness, no need to pile immediately into stone. You have to make one part flat on the ball for a muzzle, you get almost half of the ball, if you melt one side, then you need to go through with the 38th needle, but again not to the hardness of the stone yet, medium hardness (38 needles are not very deep felting, the main thing is to do it often, often on the surface). This hemisphere should look something like this.
Picture 2. We do dimples for the eyes, just nail 38 needles (I use three needles at once for speed), sometimes do twisted needles dimples, whichever is convenient to do.
Restless cats, or Felting a cute little cat and his friends
For those who already have experience in creating at least a few toys in the dry felting technique, it will not be difficult to make similar kittens, just by looking at the photo. This master class is designed for beginners, so I tried as much as possible to pay attention to the details and nuances.
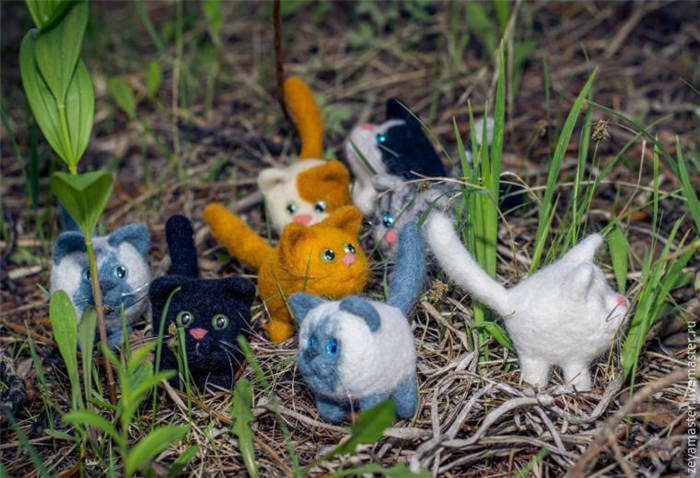
Why is there not one "little kitty" in the title, but "restless cats"? Believe me, having made one, you will definitely want to give him friends, because these curious restless creatures do not like solitude more than anything else.
Even if you've never made any toys out of wool – this master class is a great excuse to try! Delight yourself or your loved ones with a cute gift.
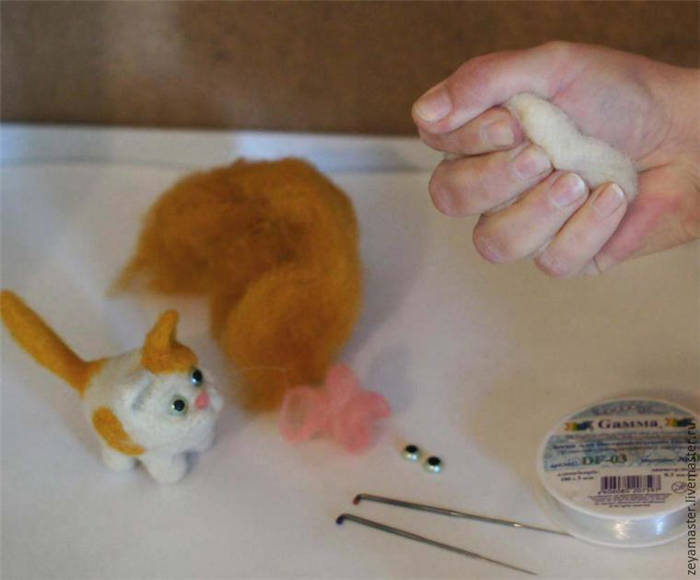
How to do it, I'll show you on the example of this baby with red spots.
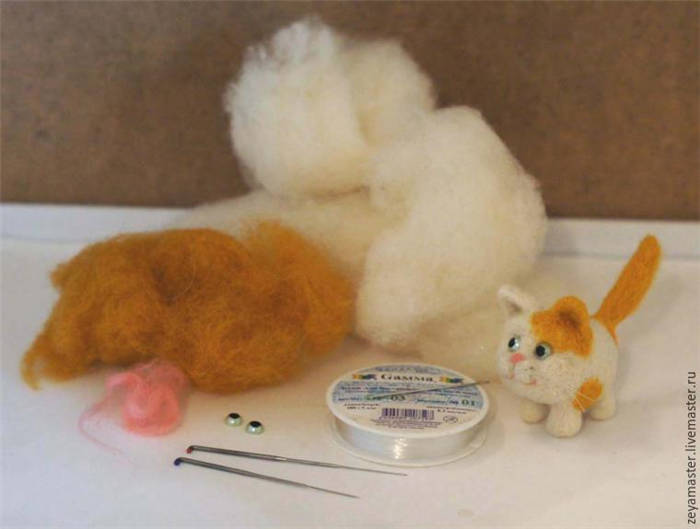
– Wool of "cat" color. It can be a cardouche, like mine or combed ribbon (which can be easily untangled with a feather duster or just in your hands). Most importantly, don't get a thin one. Semi-fine wool is best;
– Felting needles: preferably a coarse #36 and a fine #38. I have a coarse needle marked in red and a thin "star" needle marked in blue;
– Eyes no more than 6 mm in diameter. In this example, simple half beads with pupils painted in acrylic paint;
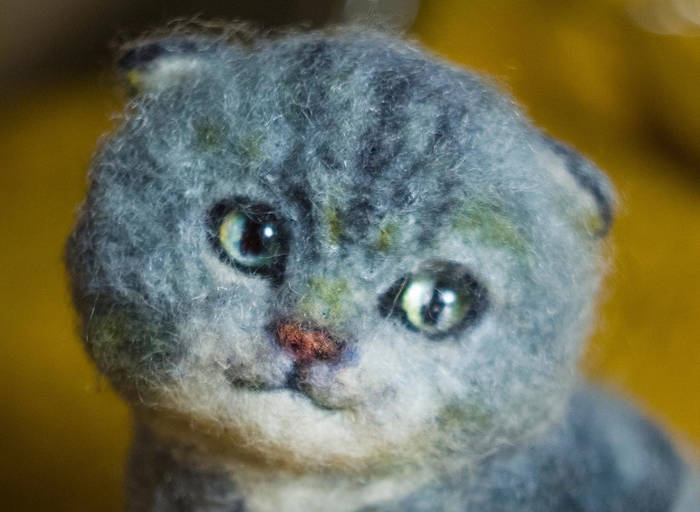
A cat from the cat fur
I was cleaning up my hard drive , looking at vintage photos, and I wanted to poldscool.
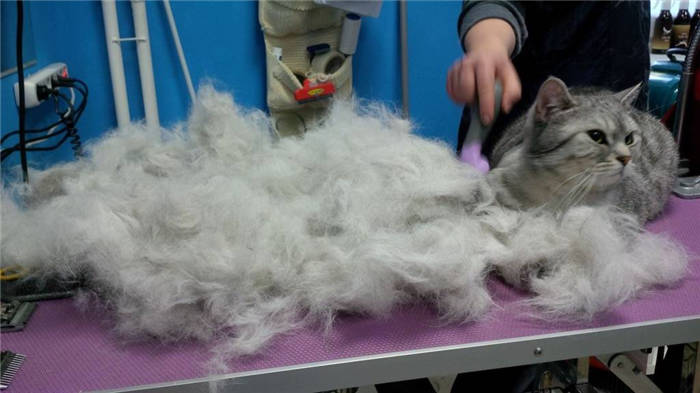
It was 2014, we were felting in wool as best we could. It started by accident – I just combed out such an impressive pile of wool from a cat that I felt bad about throwing away so much useful stuff. I had to watch a master class on felting, buy felting needles, and go.
Surprisingly, the process came out far less tedious than I would expect, although the cat's wool turned out to be, as I found out later, very hard to work with compared to felting wool. All in all, during my felting career I created 4 toys (the other 3 were already made of traditional merino), after which I was undividedly seized by polymer clay. But to this day in the depths of the closet skeins of wool are lying in wait, I pine over them and give no one. Well, what if the need arises again!
How to make a toy out of cat fur
Do you know how to make something with your own hands? Share this skill with everyone!
If you have any questions about needlework, technology, materials, etc., feel free to leave them in the community.
No trading, no prices, no links to sales pages, no author's contact info in comments. Information about materials and tools in text form is obligatory.
The author of a post with the tag [my] may leave a link to his profile, group, or channel on other sources, provided that the links (active and inactive) do not lead to direct sales. No more than four links are allowed and only at the end of the post (p. 8.5 ground rules).
-links leading to appeals, purchases, sales, subscriptions, reposts, voting and the like.
When you click on a link, it is forbidden to have active (clickable) links leading to the above in paragraph 3, the content of keywords such as "product", "service", "buy", "sell", "in stock", "on order" and the like.
3.1 The posting of the author's contacts (by the author or other users) in comments is prohibited and is subject to deletion (clauses 9.1 and 9.3 of the main rules).
It is obligatory for the authors to have the technical characteristics of the product in the publications (materials, techniques, author's methods, sizes, time-consumption, etc.) in text form.
Also, mark your work with the tag "Handmade with the process" or "Handmade without process.".
5. Post videos, post photos without text descriptions are moved to the common feed. Even if the video shows a detailed process of making, make a brief description for those who do not have the opportunity / desire to watch the video.
The administration reserves the right to decide to what extent the description corresponds to p. 5. 5.
6. Posts with violations are moved to the general feed without warning.
The author can post a new publication in the community, not allowing the comments received earlier.
Almost living wool cat. Simple mk with photos.
Even if you have never been familiar with wool and needles, if you have no idea how to create these toys with lively faces – this step-by-step master class is for you. If you do not feel in yourself the strength to try – just look at how I do it. I love my job, and I create toys with great pleasure.
Materials: felting white carded wool, copper wire, eyes, felting needles (fine, reverse, medium), comb, scissors, glue, thread and needle.
Story number one: We create the frame. I have copper wire in insulation. We bend the end of the paws like this.
The paw tips are bent like this, by stealing my husband's round pliers. I keep losing them, and my husband hides them. But I know where this secret place is, so I use it.
We put our kitty skeleton in a physiological pose. By the way, leave the tail visually very long, it seems to me all the time short for some reason. Now I always leave it with a margin.
Stage number two: wrapping. Laziness is the engine of progress, however. you can not wind the wool on a frame, and pile on. But winding is faster. We use white thread, it is a must. We start with the connection of the legs and spine. Here it is especially important to fasten it tightly, so that the legs do not dangle.
Like this. It should sit upright. The thread is not cut, we need to wind it and wind it. Let's make wool around the whole frame.
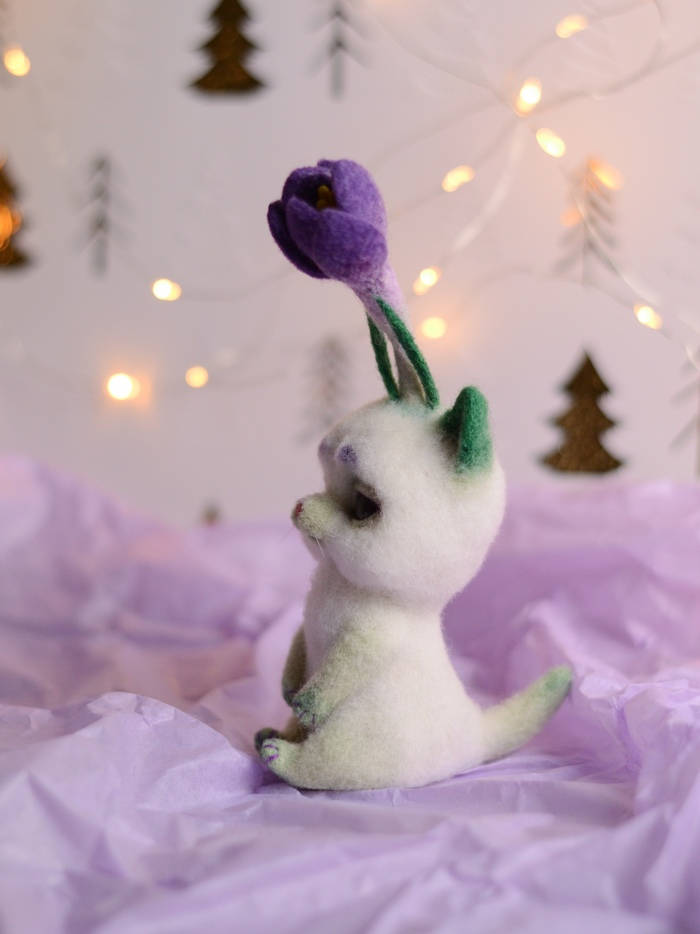
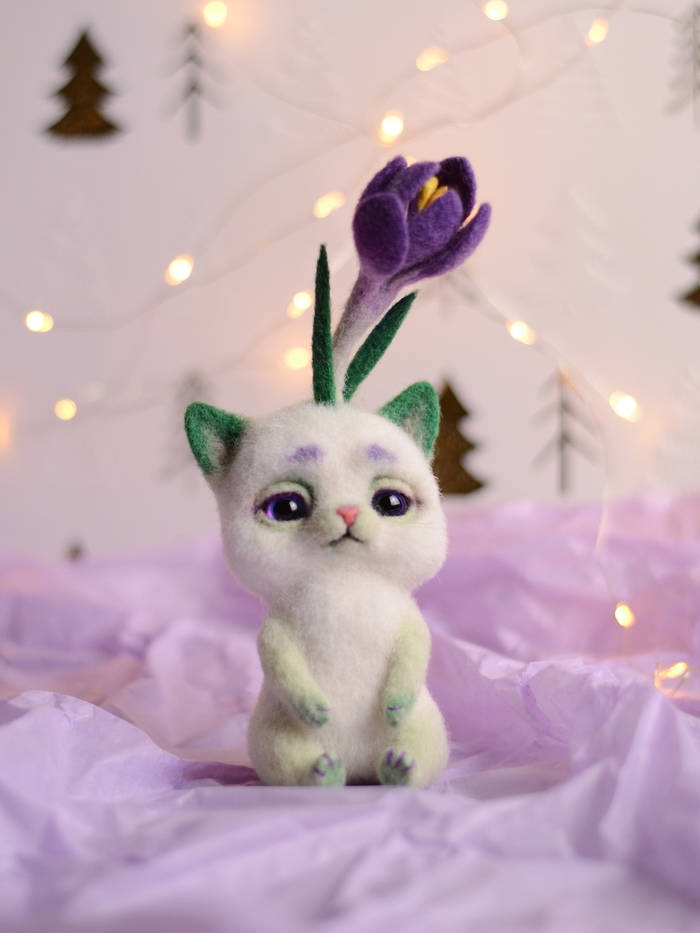
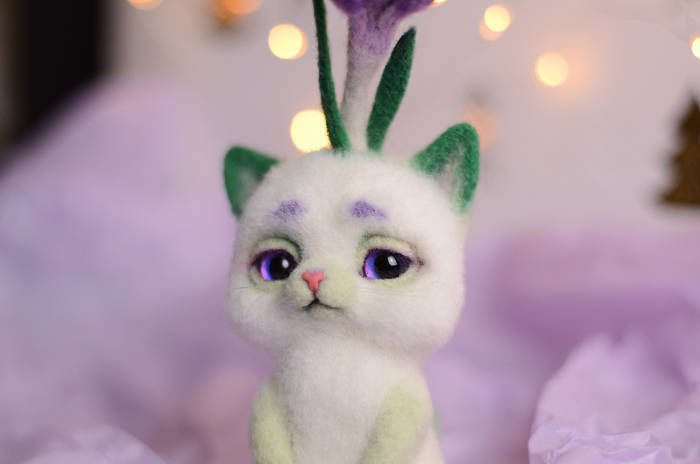
CotoCrocus

Hi all!
This work is the case when it came up on its own. In fact, I even planned a series, in different colors and emotions. Joy, sadness, anger, and something else.
But so far one of a kind.
KittyCrocus. The little guy at all, 10 cm + flower.
It's love love, so cute.
Velvety to the touch.

Nice felting kitten.
For felting a cat will need:
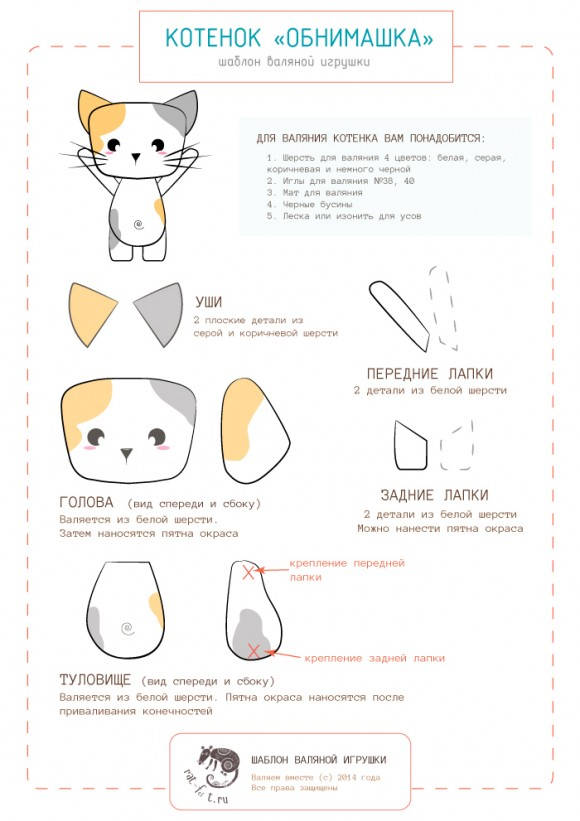
If you want, you can use a ready-made toy template as a memo
The first thing I did for clarity was to make a sketch of the cat on paper, and then redraw it in Illustrator. This is what I got:

I advise to always make sketches of future toys, especially if they are quite complicated and consist of a lot of details. Especially for you, I have prepared a template of a kitten, where you can visually see all the details that need to be felting. You can download it by following this link.
Master class on felting a kitten.
So now you have a template and a list of necessary materials, you can begin felting. The main color of the kitten is white.
Felting the main parts
Start with the head. I used two #38 needles (you can use a #36 needle if you want at this point) to give the original shape to the workpiece.
This will be the shape of the cat head. Now it is quite soft and easy to crush.
Now it only remains to compact the head of the cat, adding wool in necessary amounts and trying to stick to the original shape. Insert the needle deeply, firstly piling the inside of the toy.
When the head becomes more or less dense – here be careful not to overdo it – you can move on to felting the body.
Separate the combed ribbon long strip of wool and roll it into a tight cylinder.
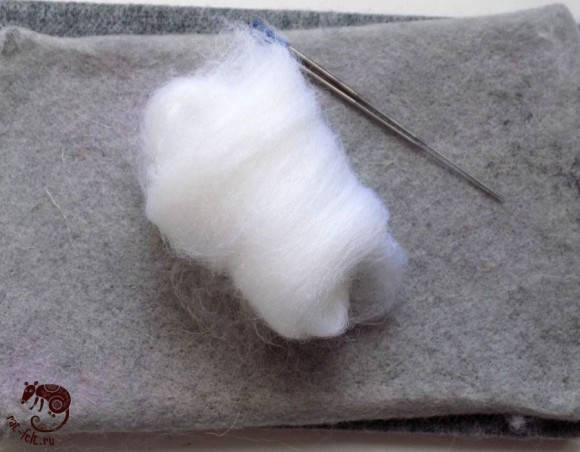
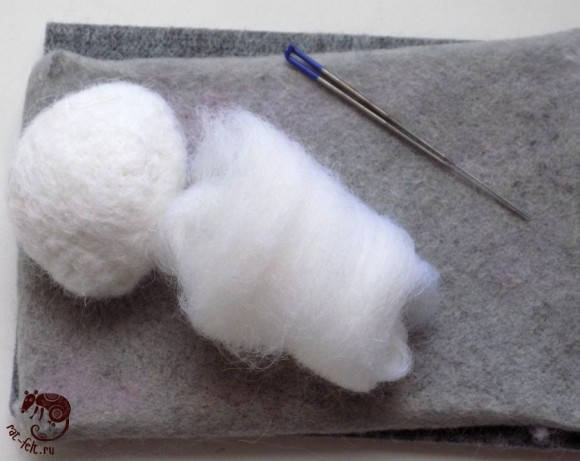
Felt the body of the cat well, so that it is cone-shaped.
For felting feet separate two equal strips of wool from the tape and roll up in triplicate.