At this stage, it is a good idea to draw a clear sketch on which you can note not only the overall dimensions of the aviary, but also what details (straight, lintel, corner) of the tunnel for cats you will need.
- Tunnel for a cat with their own hands
- Play tunnel.
- How to make with your own hands?
- What can you make a tunnel for cats, cats?
- Tunnel for cats- Very easy from hand-made materials! Video!
- The cat walks on its own: An amusement park for the pet
- How to choose?
- Original example
- Super entertainment for cats with their own hands (or how to make a cat tunnel )
- Recommendations for creating play areas according to the age of the cat
- Ideas for what to make kittens out of boxes
- How to accustom the cat to it.
- Q&A
Tunnel for a cat with their own hands
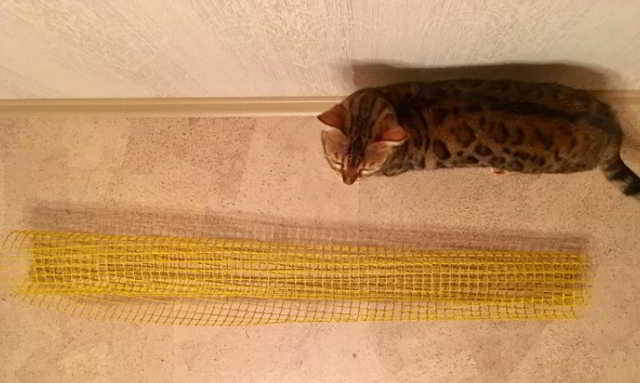
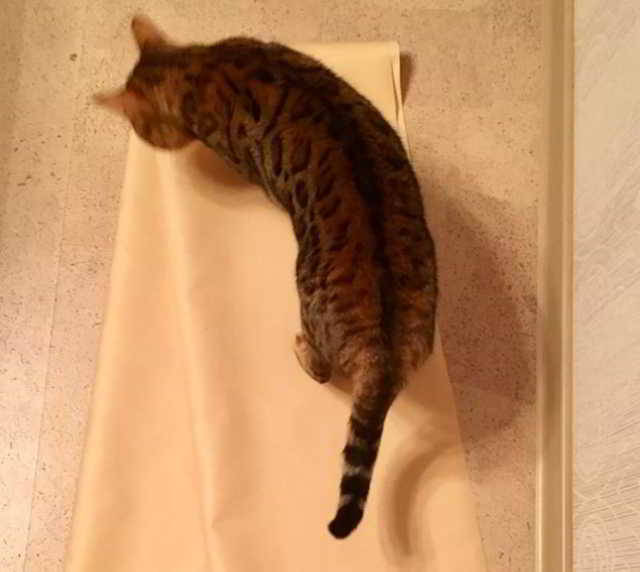
Of course, I knew about the existence of tunnels for cats, but I considered this piece of cat furniture as exotic and never planned either to buy it or to build it with my own hands. Until my cat climbed inside a roll of plastic netting designed for gardening.
She liked the new "ambush" very much, the cat could sit there for a long time. It happened during the dacha season, and I promised myself (and her) that I would build a tunnel for the apartment, after returning to the city.
It's not hard to make, and the costs are small. Make your cat happy, and you!
Of course, you can make a wider and longer tunnel, as well as do without cutting a climbing tunnel in the middle. This is a matter of taste and the size of your pet.
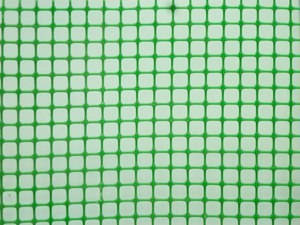
I cut the netting into two roughly equal pieces (this is necessary if a climbing tunnel is intended). I wrapped them in rolls and secured them with adhesive tape. You can use any other material – duct tape, twine.
The main thing is to fasten it thoroughly, because the cat is unlikely to treat your handiwork with care.
I joined the rolls with a narrow piece of netting. This is needed in order for the tunnel to retain its shape. Here is how the frame of the manhole looks like.
I calculated a diameter of the manhole. For this I needed a tailor's centimeter and some patience, because Her moustached majesty tried to avoid it by all means. The diameter of the hole in my tunnel is 16 cm.
I cut a hole in the tarpaulin for the hole and sewed it with a bias binding.
Sewed the edges of the tarpaulin and stretched the resulting "tube" on a frame of plastic mesh.
The tarpaulin should sit tight on the frame. In two places by hand (with threads and adhesive tape), I attached the edge of the crawl space to the net.
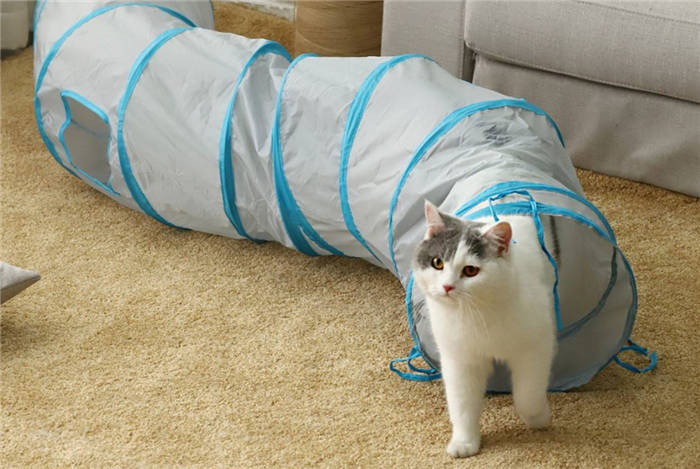
Play tunnel.
The former have the advantage of taking up little space and allow four-legged animals to exercise their natural instincts – to climb to a height. On the "floors" of the wall structure place toys, with which the fluffy will be happy to spend time. The second option combines 2 things that striped animals love – a game and a few places to rest. Labyrinths can be with lots of branching for travel.
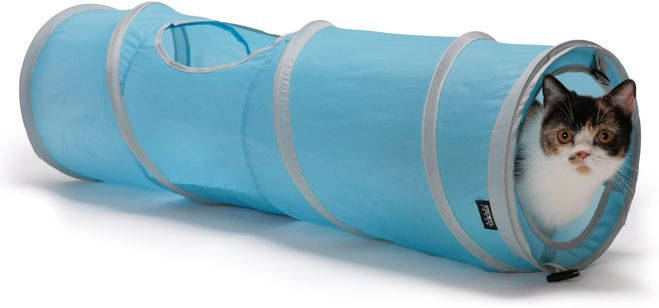
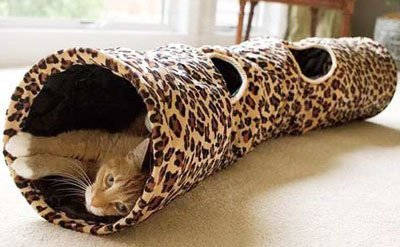
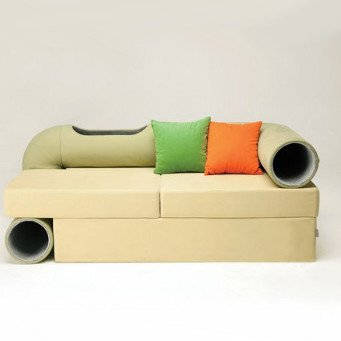
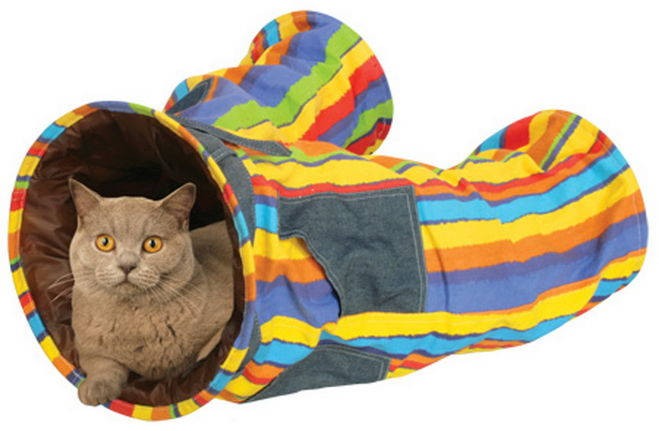
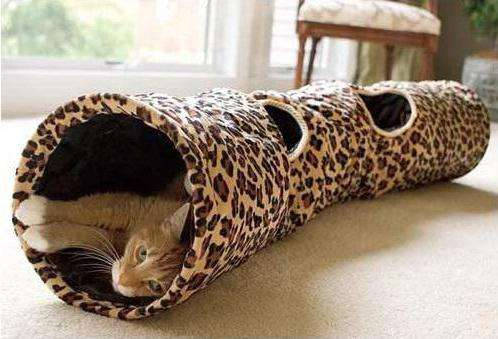
Determine which tunnel for cats will suit the pet, it is better to consider the peculiarities of the nature and the set of functions that the new cat toy will perform. Modern manufacturers of pet accessories offer a wide range of transformers for fluffy cats. The original design, made of cork-like material, is produced by Fauna International. The plush collapsible tunnel rustler for cats is made by Trixie. The houses with windows made of soft fleece are purchased from the brand Major. A sofa with a labyrinth for kittens will please both the tabby and his owner. The choice depends on the room in which the four-legged friend lives. For a small apartment, it is relevant to get a vertical structure that takes up little space, and for a large house buy whole sports complexes.
How to make with your own hands?
To make a cat accessory is real at home. To do this, decide on the model, choose the appropriate materials, and get to work. To make a tunnel, it is enough to arm yourself with a needle, thread and scissors. Need 5-7 rings, the diameter of which depends on the width of the desired house, and rustling non-slip fabric. From the textile to sew a tube and fasten the rings in it at a distance of 40-50 cm, if the product is long, cut through additional outputs. Attach the play tunnel to the wall or hang it from the ceiling. The same design equip the sofa, attaching it to the bullpen.

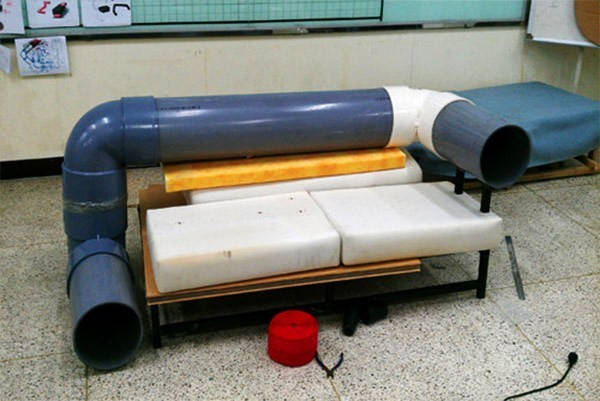
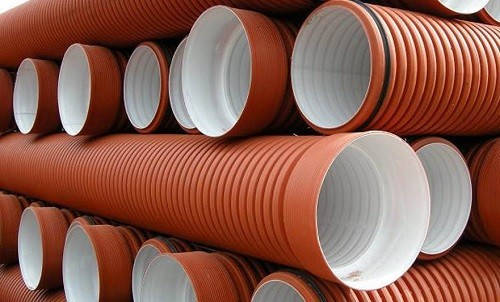
The original product is also constructed from corrugated plastic pipe of large diameter and several adapters-connectors. Here you just need to apply a little imagination and get a wonderful sports complex. In addition, the tube in the form of a tunnel will serve as a good interactive entertainment, which will captivate the owner and the cat.
When making the house, experts recommend taking into consideration the fact that a cat likes the feel of soft materials, which Trixie uses, as well as the crunchy noises of plastic and paper bags.
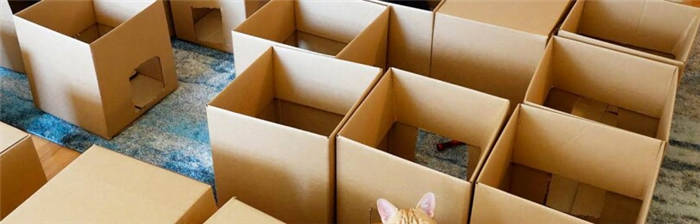
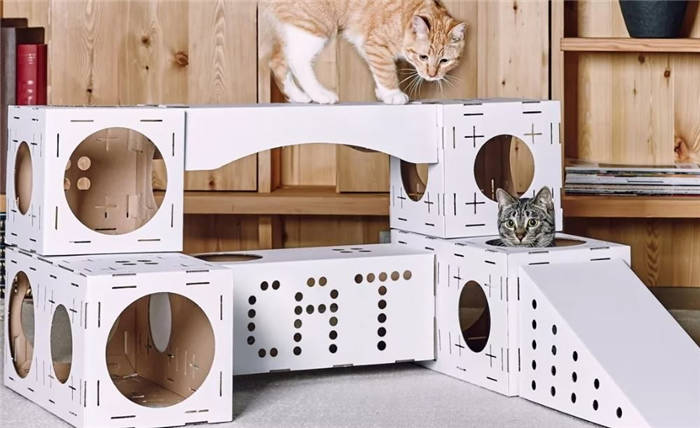
Cat owners who want to build a permanent tunnel at home with their own hands can do so using PVC pipe. It's certainly expensive, but fairly easy to install and add curves. It is used to construct both small houses for kittens and complex multi-room tunnel systems. Not everyone has the space to hold such toys. A great temporary alternative is a cardboard version of the maze. To do this, take several boxes, connect them with cardboard, rolled up into a tube with tape. Put the toys and let the cat have fun for a few hours or days.
What can you make a tunnel for cats, cats?
interested in exactly what can serve as an inner frame that will hold the round shape of the tunnel.
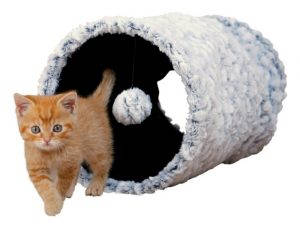
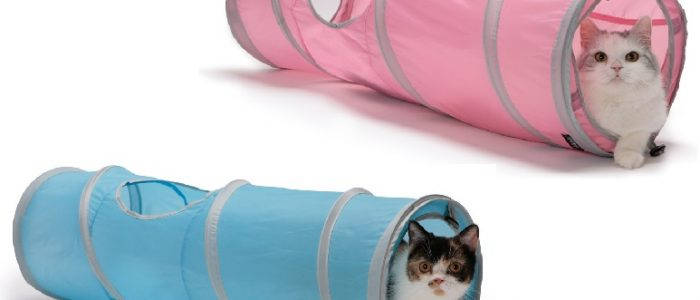
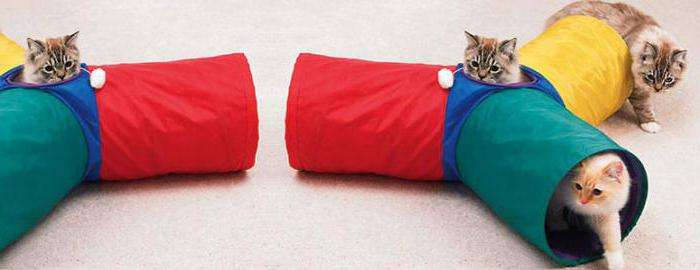
Cats love all kinds of passages, and especially if there are two or more cats in the house. A very large selection of all sorts of tunnels sold in pet stores. The principle of their manufacture is simple – any fabric is stretched on a frame that consists of several rings, made of plastic, for example.
Another option is a tunnel made of solid materials (wide rings of cardboard, covered the outside and inside with fluffy material).
If you want to make a tunnel with your own hands, here are some options.

3) From any fabric based on a frame of rings. Even children's pants can be used as a tunnel.
4) From myself I would like to add that for the tunnel will do plastic mesh, of which make several cylinders, tightening and connecting them to each other with fabric.
In conclusion, watch a funny video of a cat having fun in such a tunnel.
There are plastic tubes of medium diameter, one tube, can be a good tunnel for cats and cats.
Tunnel for cats- Very easy from hand-made materials! Video!
Of course, I knew about the existence of tunnels for cats, but I considered this piece of cat furniture as exotic and never planned either to buy it or to build it with my own hands. That is, until my cat climbed inside a roll of plastic netting designed for gardening.
She liked the new "ambush" very much, the cat could sit there for a long time. It happened during the dacha season, and I promised myself (and her) that I would build a tunnel for the apartment, after returning to the city.
It's not hard to make, and the costs are small. Make your cat happy too!
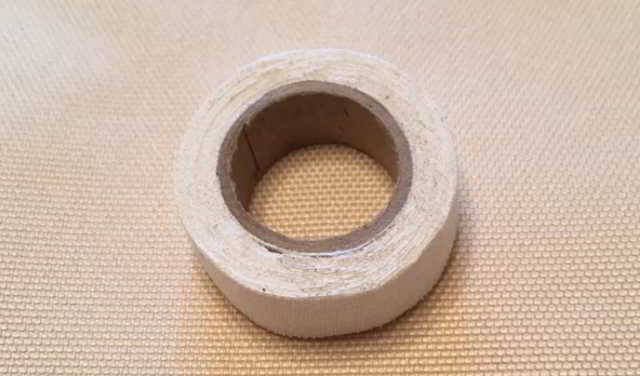
Rolled tape.
I cut the netting into two roughly equal pieces (this is necessary if the climbing is intended). I wrapped them in rolls and secured them with a band-aid. You can use any other material – duct tape, twine.
The main thing is to fasten it thoroughly, because the cat is unlikely to treat your handiwork with care.
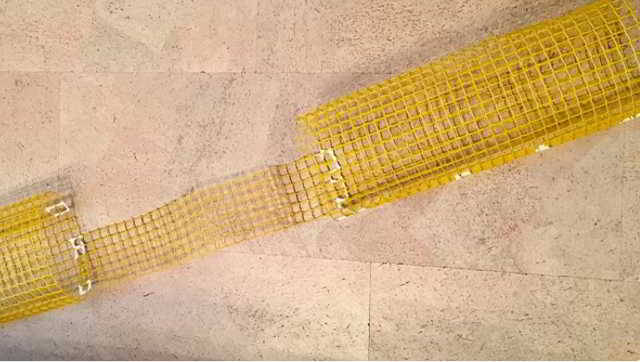
I joined the rolls with a narrow piece of netting. This is needed in order for the tunnel to retain its shape. Here is how the frame of the manhole looks like.
Calculated the diameter of the crawlspace. I needed a dressmaker's centimeter and a little patience, as Her Mustached Majesty tried her best to avoid "fitting. The diameter of the hole in my tunnel is 16 cm. You can make it 20 cm, so the cat will certainly fit through.
The cat walks on its own: An amusement park for the pet
Houzz Contributor. Because We Can is a new kind of architecture firm: A Design-Build Studio. That's a mash-up of architects, artists, builders, designers, and fabricators. With our own robot-empowered fabrication shop, we make what we design.
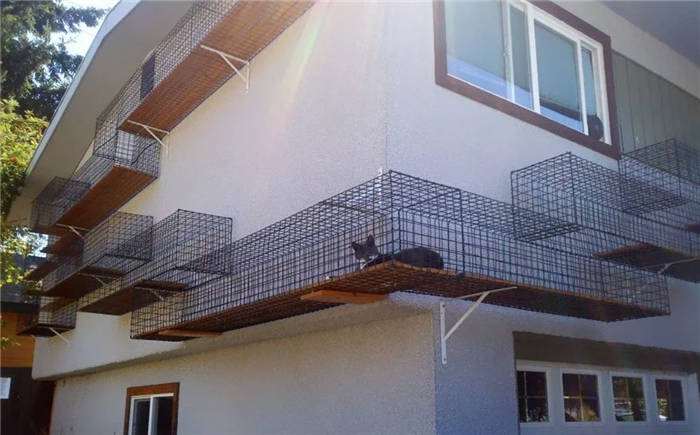
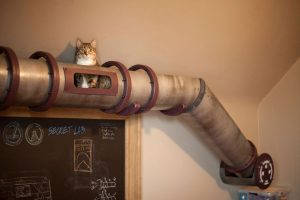
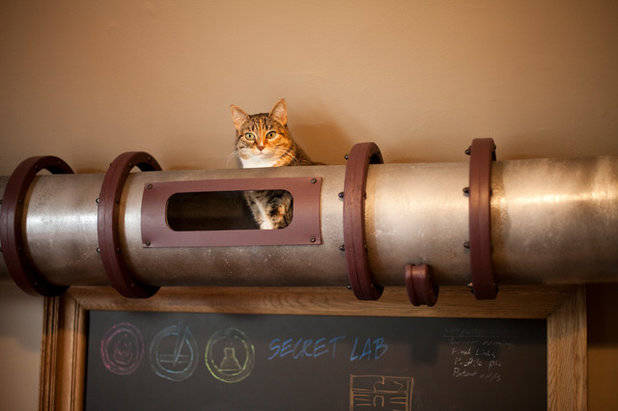
Cats are always up to something, which is why the owners of one of them decided to channel her energy into peaceful uses. They built a secret cat tunnel in a private home in San Francisco: now their furry friend can get around the room, not once stepping on the floor or computer keyboard. After all, she has her own steampunk shelter.
This construction looks simply stunning, reminiscent of Kathryn Bigelow's early work. Using the right materials and tools, you can make a tunnel for your cat and your pets with your own hands. Proven: it will be fun for everyone.
First, think about exactly where to tunnel for your cat. The California design firm Because we can, who were approached by the cat owners to implement their plan, decided to run a tunnel around the perimeter of the room, hanging it on large hooks.
In looking for the right place, think about what your cat likes to do. Most of them love to hide, peek out of hiding places, jump on tall pieces of furniture and look down on everything. This lifestyle was taken by the designers as the basis for the design.
The entrance to the tunnel is above an old trunk that has been in this room for a long time. Nothing is easier for a cat than to jump on top of the trunk and then dive into the secret passage.
The tunnel, laid at the junction of the walls and ceiling, forms many so-called viewing platforms from which the cat can peep at its owners.
Windows resembling embrasures or portholes allow the cat to "watch the object" (i.e. the owners) from a hiding place.
How to choose?
Choose the right tunnel for your cat, and you will no longer have to get her out of hard-to-reach places: from under cabinets, sofas, bathtubs and other narrow crevices.
- Choose a model according to the age of the cat. Young and temperamental cats will be fine with multi-level toys with several extra sleeves. Older animals use tunnels as a place to sleep and rest, a simplified design will do for them.
- Take into account the size of your apartment. Vertical wall-mounted patterns are ideal for small-sized rooms. Horizontal multilevel designs require more space.
- Choose a toy with your cat's temperament in mind.
- Consider the size of your cat. Tunnel sleeves come in different diameters, make sure your pet won't get stuck in them.
- Match the design of the play pipe with the design of your apartment. Whether this feline fixture will harmonize with the interior or become a bright standout spot is up to you.
Original example
Cats are always up to something, which is why the owners of one of them decided to transfer its energy into peaceful channels. They built a secret cat tunnel in a private home in San Francisco: now their furry friend can walk around the room, not once stepping on the floor or computer keyboard. After all, she has her own steampunk shelter.
This design looks simply stunning, reminiscent of Kathryn Bigelow's early work. Using the right materials and tools, you can make a tunnel for your cat and your pets with your own hands. Tested: it will be fun for everyone. 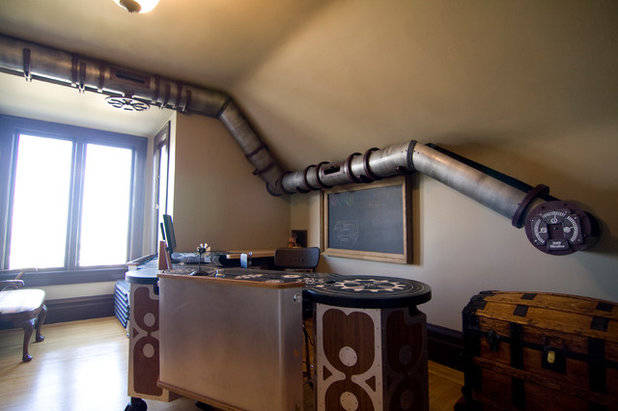
First, think about where to tunnel for the cat. The California design firm Because we can, who were approached by cat owners to implement their plan, decided to tunnel around the perimeter of the room, hanging from large hooks. 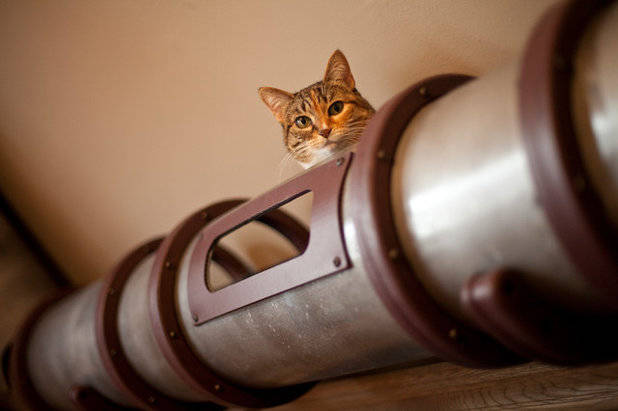
First, think about where to tunnel for the cat. The California design firm Because we can, who were approached by cat owners to implement their plan, decided to tunnel around the perimeter of the room, hanging from large hooks.
In looking for the right place, think about what your cat likes to do. Most of them love to hide, peek out of hiding places, jump on tall pieces of furniture and look down on everything. This lifestyle was taken by the designers as the basis for the design. 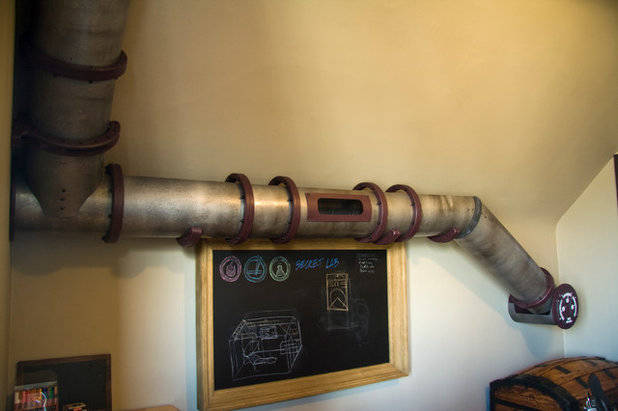
The entrance to the tunnel is above an old trunk that has been in this room for a long time. Nothing is easier for a cat than to jump on top of the chest and then dive into the secret passage. 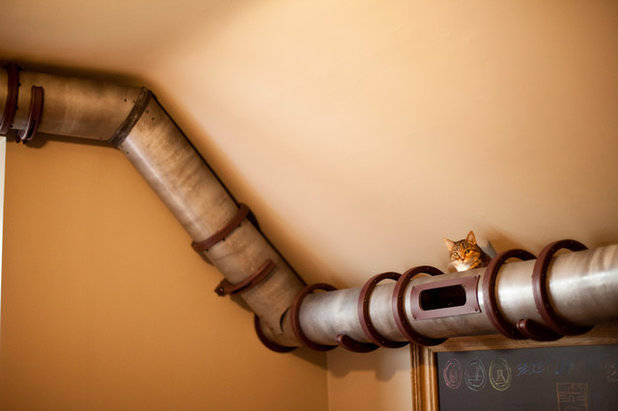
The entrance to the tunnel is above an old trunk that has been in this room for a long time. Nothing is easier for a cat than to jump on top of the chest and then dive into the secret passage.
Lined at the junction of the walls and ceiling, the tunnel forms many so-called viewing platforms from which the cat can peek at its owners. 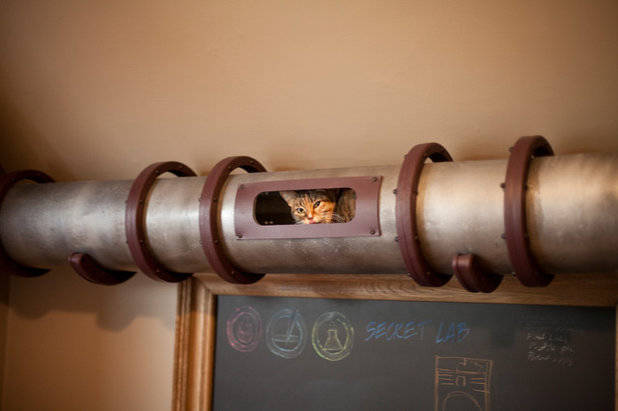
Windows resembling embrasures or portholes allow the cat to "follow the object" (i.e., the owners) from concealment. 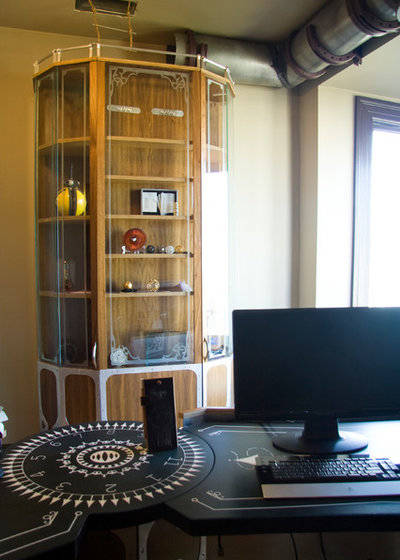
Windows resembling embrasures or portholes allow the cat to "follow the object" (i.e., the owners) from concealment.
By circling the room, the tunnel exits to the top shelf of a tall shelving unit. Luckily, the shelving unit is also a creation of Because we can, so the designers put a protective fence there in case the cat, having had its fill, falls asleep too close to the edge.
The fence is made of aluminum slats and corners with round holes. Both are sold in most construction stores. 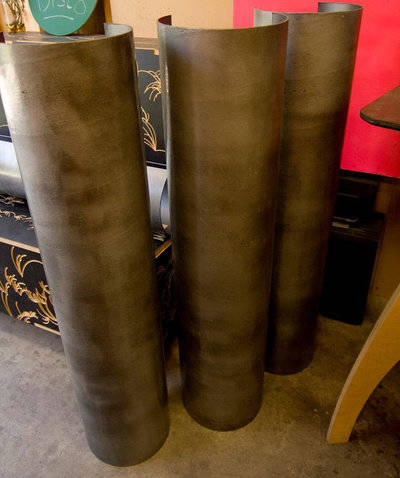
The body of the tunnel is a waxed cardboard tube, which is used for casting concrete products. This cheap material can easily be bought at a construction
store and sawed with an ordinary jigsaw. The designers cut off the top of the pipe (about a quarter of the diameter) so that the cat can "inspect its possessions" from a height, plus it's easier to clean the pipe that way.
The designers then painted the outside of the pipe to make it look like it came from an old factory. First they applied a primer,
then a coat of silver paint, and finally a paint to simulate worn
bronze.
The inside of the pipe was laminated with the fabric used to trim
for the speakers in the car. It has a lot of advantages: it's inexpensive, easy to cut and creates the friction needed for comfortable walking inside
cylindrical surface. 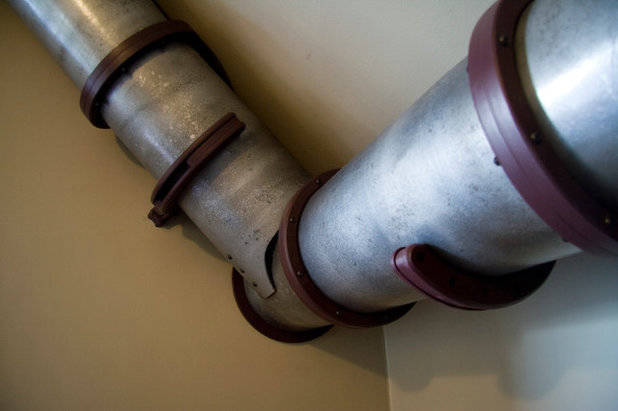
The body of the tunnel is a waxed cardboard tube, which is used for casting concrete products. This cheap material can easily be bought at a construction
store and sawed with an ordinary jigsaw. The designers cut off the top of the pipe (about a quarter of the diameter) so that the cat can "inspect its possessions" from a height, plus it's easier to clean the pipe that way.
The designers then painted the outside of the pipe to make it look like it came from an old factory. First they applied a primer,
then a coat of silver paint, and finally a paint to simulate worn
bronze.
The inside of the pipe was laminated with the fabric used to trim
for the speakers in the car. It has a lot of advantages: it's inexpensive, easy to cut and creates the friction needed for comfortable walking inside
cylindrical surface.
Once you cut off the top of the cardboard tube, it will no longer hold its shape. To turn it back into a cylinder, we had to make support rings that, like the hooks, secured the pipe to the wall. All the hooks and rings were cut from plywood.
Tip:
We suggest using a stencil to draw a detail on the plywood; all that remains is to cut it out with a jigsaw. 
This is what the stencil for the support ring looks like. It was made especially for this project. The parts are 2 cm thick and cut out of plywood. 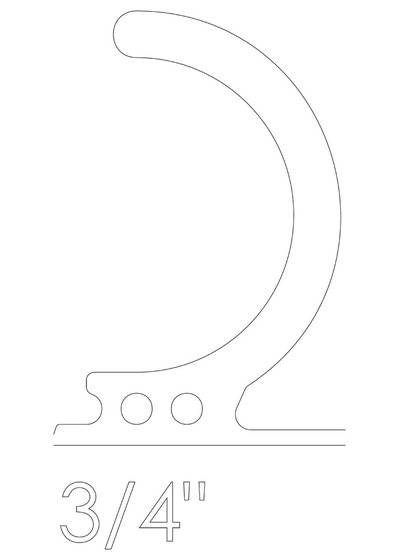
This is what the stencil for the support ring looks like. It was made especially for this project. The parts are 2 cm thick and cut out of plywood.
This is the stencil for sawing the fastening hooks. It was also made of 2 cm plywood. 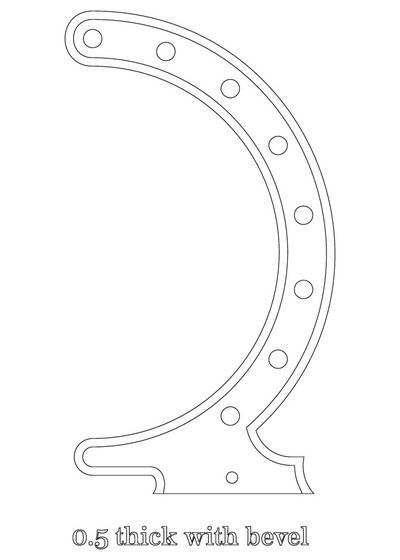
To make the hooks look more textured, we decided to give them a more interesting shape. These are the decorative elements we cut out of 1.3 cm thick MDF; they were attached to the hooks on both sides. 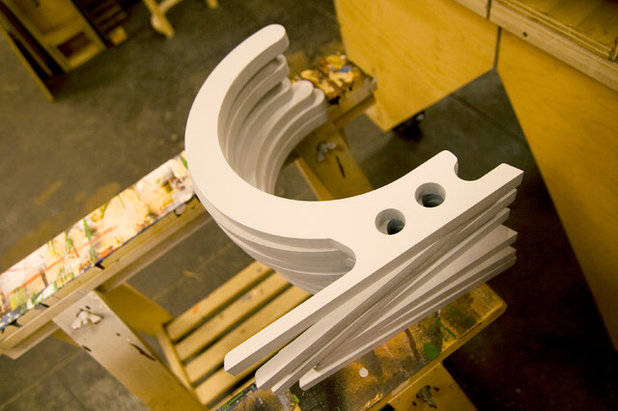
To make the hooks look more textured, we decided to give them a more interesting shape. These are the decorative elements we cut out of 1.3 cm thick MDF; they were attached to the hooks on both sides.
After sawing the rings, hooks (pictured) and decorative elements, they were coated with primer and painted. This gave the elements a more "industrial" look.
If you do not have the opportunity to paint parts with spray paint, use a foam roller instead of a brush – so the paint will lay more evenly. Use round cap screws and nuts to connect the wooden parts to each other.
It remains only to securely attach the entire structure to the wall: try to find the places where the support beams pass. Attach the structure to them with dowels and self-tapping screws. If you can't find the beams, use extra strong fasteners, such as anchor bolts. If you can't do it yourself, have a handyman do it. 
The result is a tunnel that looks like an industrial chimney with a very happy cat walking on it!
Materials:
Super entertainment for cats with their own hands (or how to make a cat tunnel )
For the first time I saw this entertaining thing for ponytails in the cat shelter. It hid an adorable little boy Ronnie.
And I really wanted to repeat it at home, especially since the design was elementary and it is not difficult to sew. That's what I did at my leisure. Just at home got "dusty" piece of backing fabric and cable (pretty thick, well-shaped).
The first thing I decided to determine was the diameter of the future tunnel. A small plastic basin was perfect for this size.
When the question of diameter was solved, I estimated the number of cable inserts along the length of the tunnel. I settled on four.
To make the tunnel more interesting for the cats, I added another side opening.
I cut off the excess fabric from the sides. And from one such piece made the edging of the cut out window.
Then sewed the width of the fabric commensurate with the diameter of the future tunnel.
Now there was the hardest part, if I may say so. To sew and insert the cable circles.
I decided to start with the central elements. To do this, the fabric was folded this way.
I turned some part inside out (sorry for the quality of the photo. It was at night, the light was dim and the flash was on. Because of that the fabric began to shine).
After I turned the fabric inside out, I took a 2 cm step back from the inside out edge and added a seam. But not the entire length (ie, the width of the tunnel)! Leave 8-10 cm to be able to slip the cable through them.
Then we turn the fabric back to the front side. The seam on the front side looks like this
And to keep the stitched fabric inside without hanging out, we make another seam, sewing it, so to speak) over the face. I guess you get something like a linen stitch. Here already we lay the seam across the entire width of the tunnel.
Also do not forget to leave 8-10 cm for pulling through this hole cable.
Recommendations for creating play areas according to the age of the cat
Assembling mazes for kittens with their own hands, you can not devote much time to durability and reliability of the design – anyway, the kids will tear the craft faster than they will even grow out of it. It is better to try to create the most developing complex for kittens with lots of interactive elements.
Adult pets behave more calmly and do not have such a strong need to tear and break toys (especially if they have a special scratching post), so play mazes for older cats should be thorough and beautiful. The play area will last in the room for many years, so it is important that it not only be reliable, but also fit well into the interior of the room.
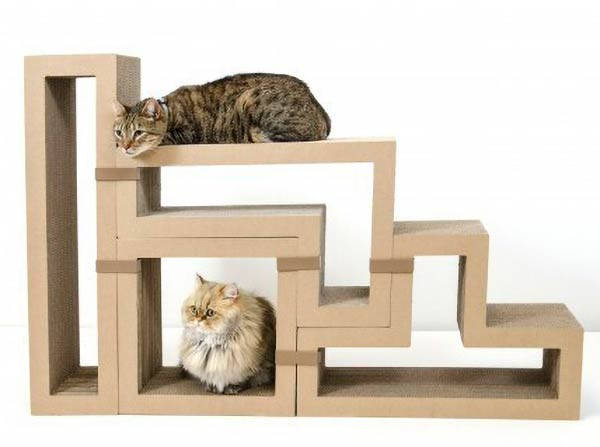
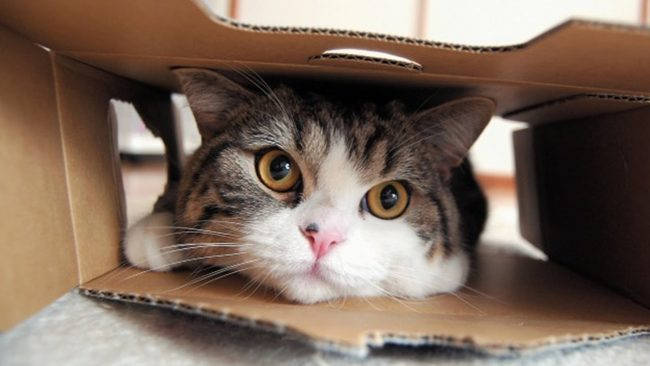
Older animals of both sexes are no longer as active as youngsters. "Older ones" will appreciate quiet but engaging toys, such as hole boxes.
Ideas for what to make kittens out of boxes

How to accustom the cat to it.
With the outdoor option, it may take some time for your cat to get used to the idea that she is now allowed outside. Not to mention the fact that the strange tunnel suddenly connected to the window leads to a beautiful playground.
To help her get used to it, you can start with a play tunnel inside the house. The cat will get used to crawling into it and will see that it is really interesting to play inside and there is nothing dangerous.
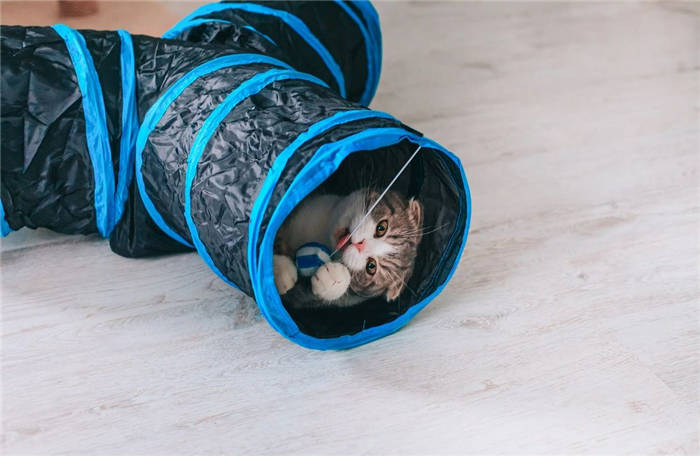
If your cat is wary of the pet tunnel, you can either place small toys in it, such as a catnip ball.
Whatever happens, don't force the cat, as it may scare it and the tunnel will be associated with fear. It's better to give the cat time to figure it out on her own. Talk to her in a friendly and relaxed tone. Once you start to feel stressed and irritated, your cat will sense this and become wary of the whole situation.
Q&A
You can hang some catnip mice to make playing more fun, add a litter tray or pot of plants that are good for cats, add toys, inflatable bridges. A hammock on which you can rest after chasing the mice.
You need to make sure that it is secured, will not roll over and there is nothing to hurt yourself inside.
The tunnel will make the animal feel secure. It is enclosed and dark. You can put the tunnel so that it leads to the litter box or food.
Although cats like to squeeze in where it is impossible to squeeze in, the tunnel should be able to stand quietly.
Cats are nocturnal animals and can feel more confident in the dark. She can do her research at any time of day.