Actually, on these antennas I put the ears: just put them on and did not fasten them. They are quite stable. And the makeshift headband made of wire worked perfectly well during the whole photo shoot. And because it's so thin, it was easy to hide it in my hair. In none of the photos did I have to remove the protruding wire in photoshop.
- How to make cool fur ears for a photo shoot in 10 minutes: even with my crooked hands it turned out beautifully
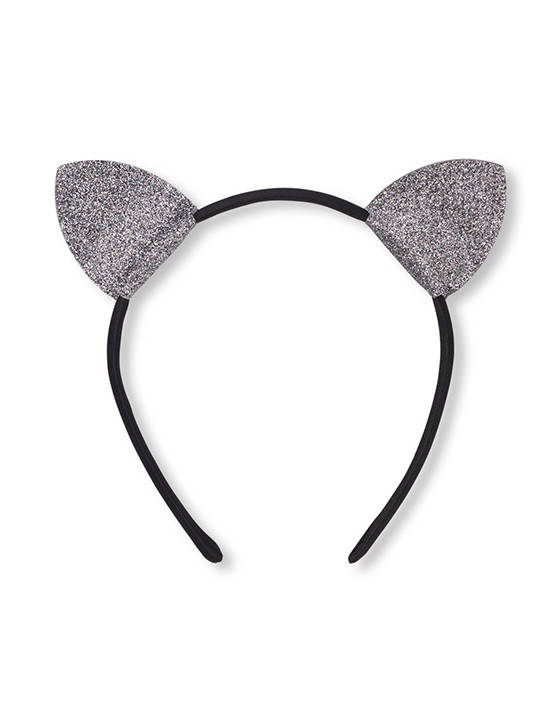
- Cat ears out of felt with my own hands
- Headband with soft cat ears with their own hands: a video lesson
- Cat ears on the headband with your own hands. Step by step master class with photos.
- The simplest cat ears from the same beads
- Cat and bunny ears out of felt and paper
- How to make cat ears with your own hands
- Option 1: Ears from cardboard
- Recommendations
- How to make cat ears with your own hands
- Option 1: Ears from cardboard
- Recommendations
- How to make cat ears
- Making paper ears
- How to make cat ears with your own hands
- Option 1: Ears from cardboard
- Recommendations
How to make cool fur ears for a photo shoot in 10 minutes: even with my crooked hands it turned out beautifully
Hi, this is Creative Cat with you. I have my creative profile on instagram , create unusual images, do cosplay, talk about cosmetics, write about things that inspire me.
Have you long dreamed of a fabulous photo shoot with furry ears? Or want to make a fox costume for your child? I'm here to help you with advice. Just last week I made myself some awesome ears that will now become my channel mascot. After all, everyone knows me as kitsune (vixen in Japanese).
Honestly, I'm not very good at needlework. My imagination works well, I can come up with a lot of interesting props for photo shoots. But the mindset is not engineering at all. Not at all. I have a hard time figuring out what to connect to what and how to attach it to hold it well. But this time I decided to overcome myself and make big fur ears for the new photo shoot as a vixen. Out of my comfort zone as much as possible, so to speak.
Early in the morning I went in search of fur. I was lucky: at a nearby mall a huge textile store had opened. There were several variants of fake fur hanging on one stand: I took a red-haired one, looking like a chanterelle as much as possible. True, the fur itself is called "raccoon. But for a raccoon it is too red, it seems to me. Although, maybe I do not know something about raccoons :).
A meter of fur cost 2200 rubles, but where do I get so much? It was a pity to throw it away, but for my ears I needed just a little bit, just a couple of pieces. Fortunately, the store said that they cut the pieces from 20 centimeters. So always ask the seller, so as not to take too much and not to overpay. In the end I got a piece of fur 1.5 meters long and 20 centimeters wide. Even this is too much, in theory, and enough for paws and tail. I paid 440 rubles for this miracle.
This fur is very similar to the real thing, it even has a thick undercoat. Honestly, I do not know why buy real (and it's not about savings, but a love for our furry brothers). I would love to make myself a fur coat for the winter from such faux fur. We just need to see what styles will be trending next season.
Cat ears out of felt with my own hands
Recently, very often order cat ears. It is very easy to sew them yourself.
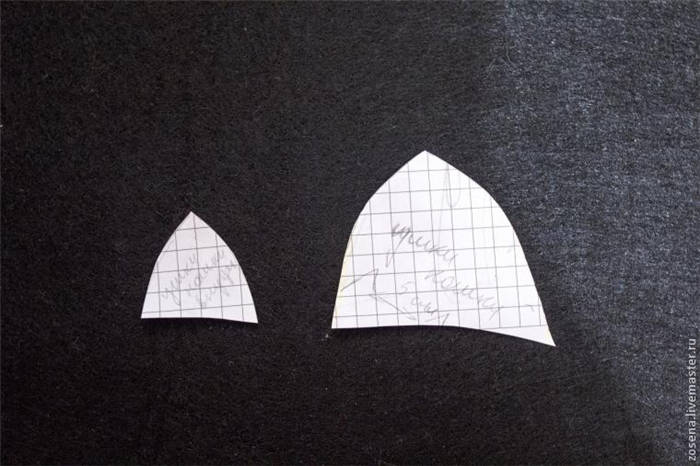
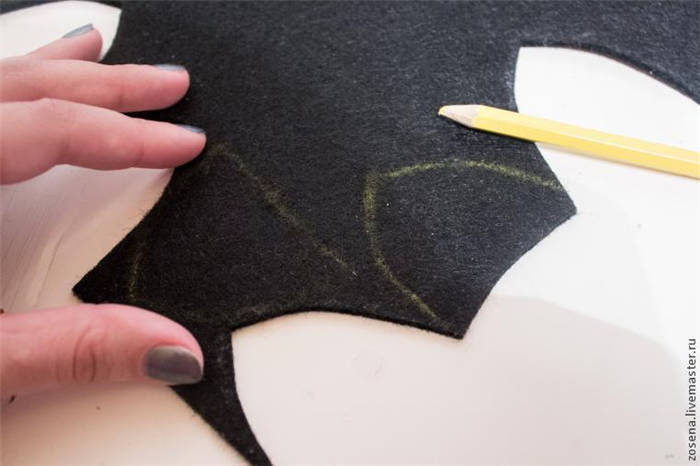
First, let's cut out the ears themselves from thick felt on a larger pattern, we have ears with a bend to sit more evenly, so the pattern is translated in a mirror reflection.
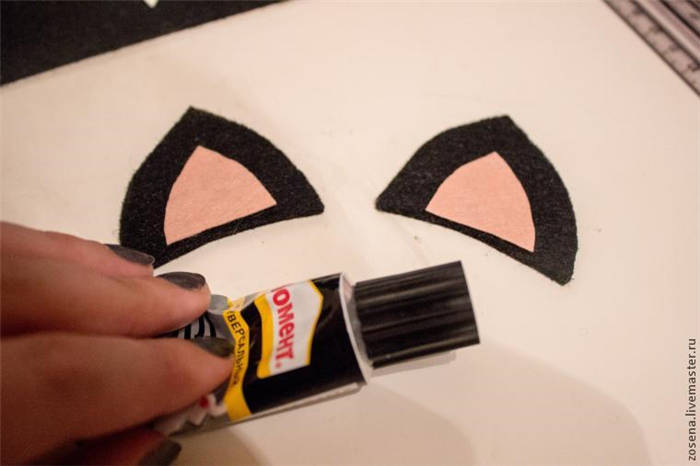
On smaller pattern cut the inner part of the thin felt. I take 0.5 because gluing it does not have a strongly protruding border.

Glue the ears to the bottom coincided and the tops were the same direction, in general, evenly. 
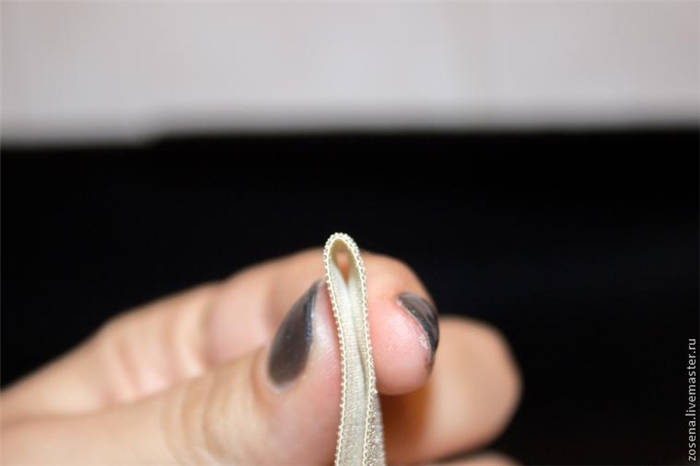
We begin to sew on the bandage – oblique sashing. First, sew the ends of the elastic, hide the knot and put it on the front side.
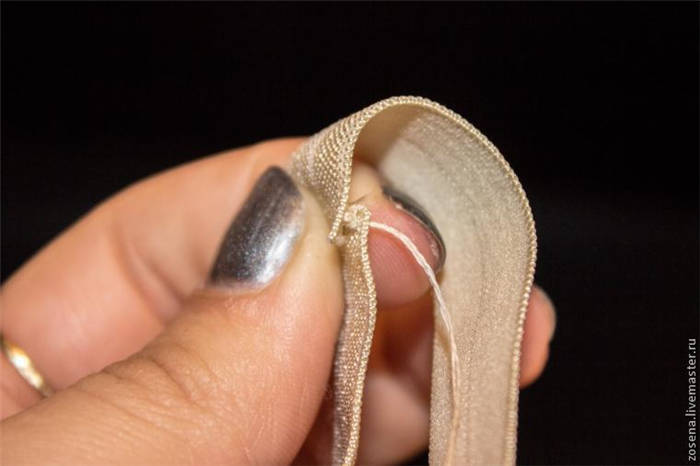
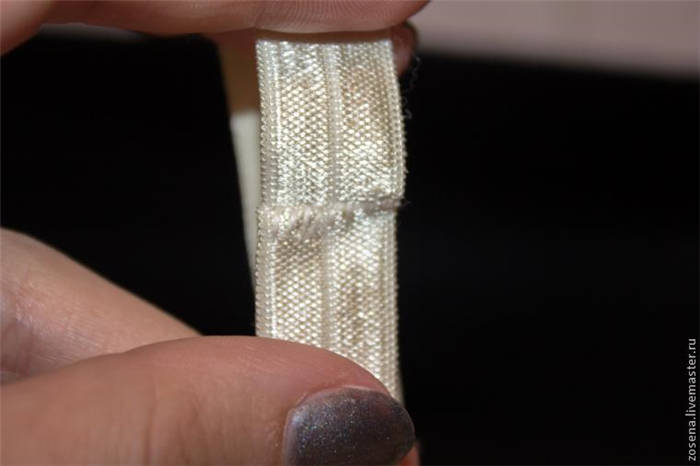
Then we bend it in half, we will have a scar on the back. We need to determine the upper middle of the rubber band.
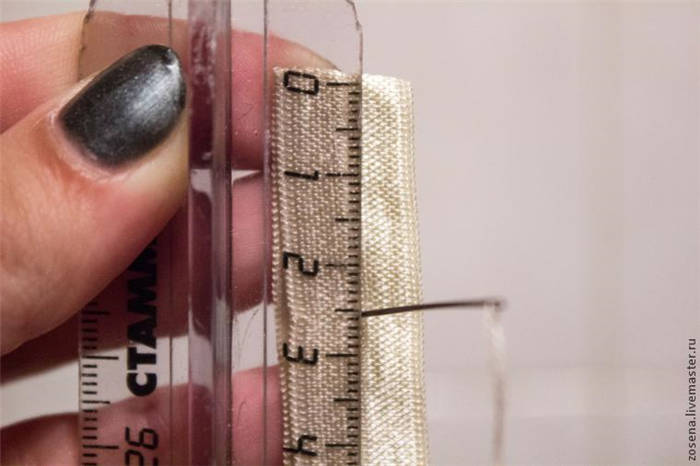
From the upper middle we measure 2.5 cm. I am making ears for 2 years, and the distance between them is 5 cm, in my opinion, optimal.
Headband with soft cat ears with their own hands: a video lesson
We make with the help of a glue gun from an old soft toy furry cat ears for girls and not only. For a good mood or cosplay.
LIMITED LIABILITY COMPANY "INFOWROK" 4, office 407, Verhne-Sennaya St., Smolensk region, 214000 OGRN 1136733016441 INN 6732064123 KPP 673201001
- Russian ruble
- Ukrainian grivna
- Br Belarusian ruble
- Kazakh tenge
- $ US Dollar
- € Euro
- AU $ Australian dollar
- CA $ Canadian dollar
- Chinese yuan
- DK kr Danish krone
- ¥ Japanese Yen
- NKr Norwegian krone
- S $ Singapore dollar
- kr Swedish krone
- Fr Swiss franc
- Pound sterling
- Turkish Lira
Privacy Policy
© Internet site "Fair Masters"..
LLC MC Livmaster, 2023.
© Advertising systems "Marketplace 2.0" и "Livemaster".
Livmaster LLC, 2023.
The word marks Fair Masters® and Livemaster® are registered trademarks.
Use of the website, advertising systems, and trademarks without the required permission is punishable by law.
Cat ears on the headband with your own hands. Step by step master class with photos.
Today I offer a detailed master class on making ears for the carnival costume of a cat on the headband. Of course, there are a lot of options for their making, but I will tell only one of them.
On cardboard, draw a pattern of the ear of the size you want to see on the headband. The height of the ears in my case is 5, 5 centimeters and the width of 6.5 centimeters.
Now fold the felt in half and around the template to get a double ear length. The resulting blank is cut out and that's what I got:
From the fur also cut blanks, but a little less than the template, about 2 mm less on each side.
Now we are going to glue the felt pieces to the headband with a glue gun. First, glue the middle of the workpiece as in the photo. Only it is necessary to place the ears on each side.
Now fold the felt in half and glue the parts together. It looks like this:
Then we glue the second part in the same way, but don't forget to mark its location beforehand.
As I chose a gold headband for making this accessory, I also took a gold braid for decoration.
In general, the cat ears for the carnival costume are ready and already look nice. But my daughter really wanted to see bows on them. Some colored options did not fit, but I had in stock small bows made of glitter foamir, which came in handy. I used to make these bows myself, but until today I haven't found a use for them.
One bow I glued on each ear and now a headband with cat ears for my daughter looks like this:
According to this master class you can do the ears in different ways. If you take as a basis the first part, when the base is made of felt, and decorate differently, based on the materials that are at hand. For example, instead of fur, you can take felt of a different color, and instead of the braid, glue rhinestones or semi-beads on the contour.
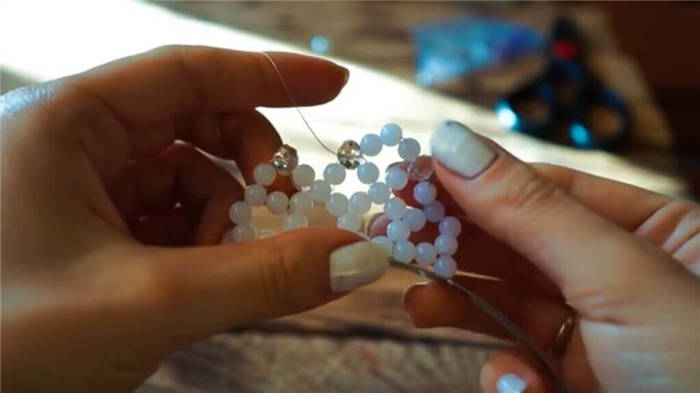
The simplest cat ears from the same beads
The first master class: cat ears with their own hands is the easiest. You can make such ears in a few hours. Despite the simplicity, they look very good on the head. For this work, it is enough to take any old beads or beads bought in a store for needlework.
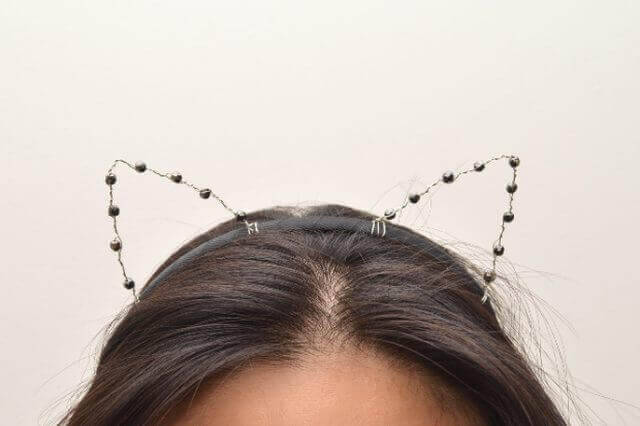
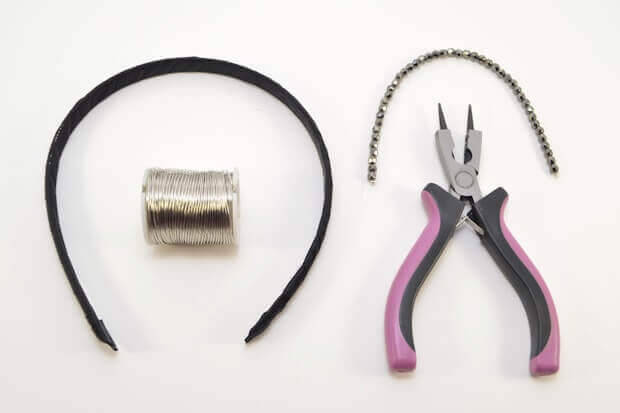
One condition is that the beads must be the same. Also, you will need 1-2 mm wire. The main thing is that it must hold the shape of the ear and not sag. You need to take the thinnest rim.
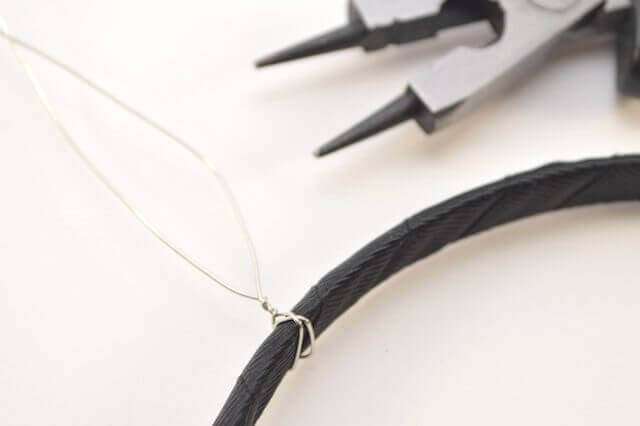
Mark on the rim the place where the ears will be located. Bend the wire in half. Fix the wire on the rim, twisting it with wire cutters. Twist the top 3 times.
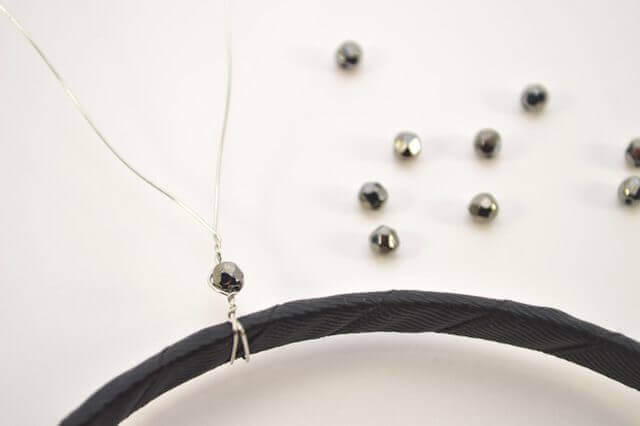
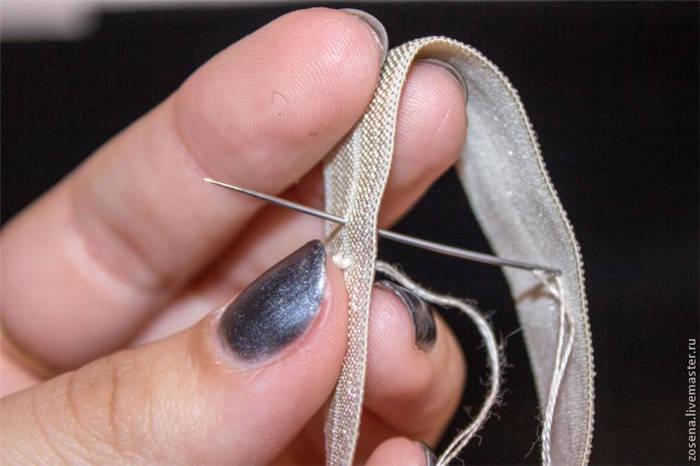
Insert 1 end of the pr-ka into the bead, the second end wraps around the bead and twist 3 times.
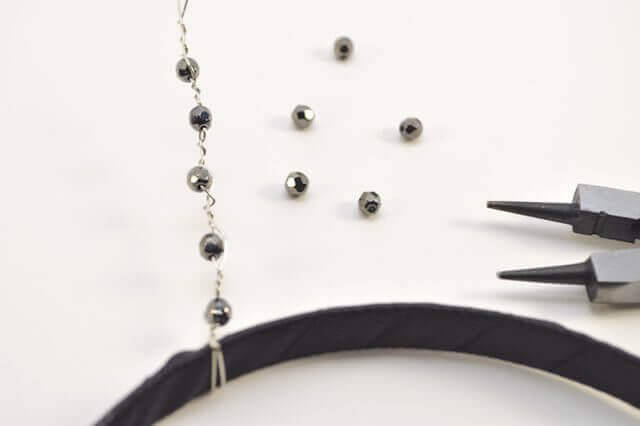
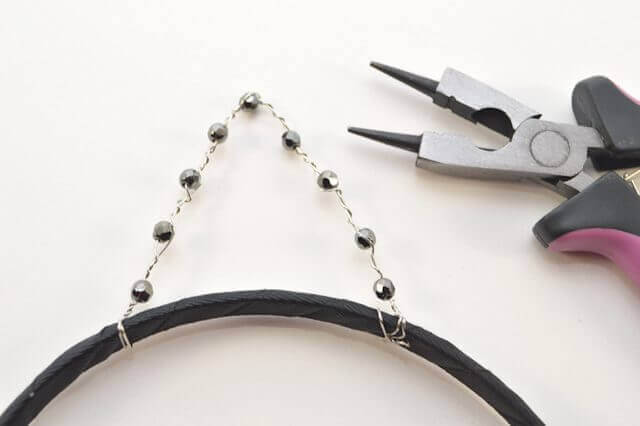
At the end again secure the wire to the rim with wire cutters. Do the same for the second ear.
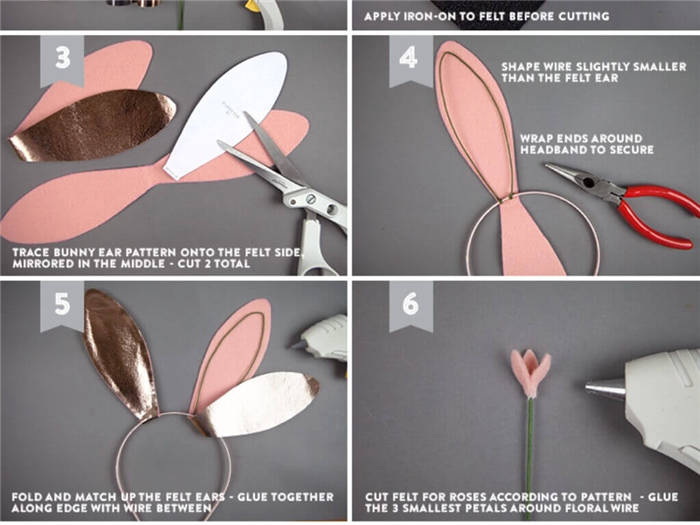
Cat and bunny ears out of felt and paper
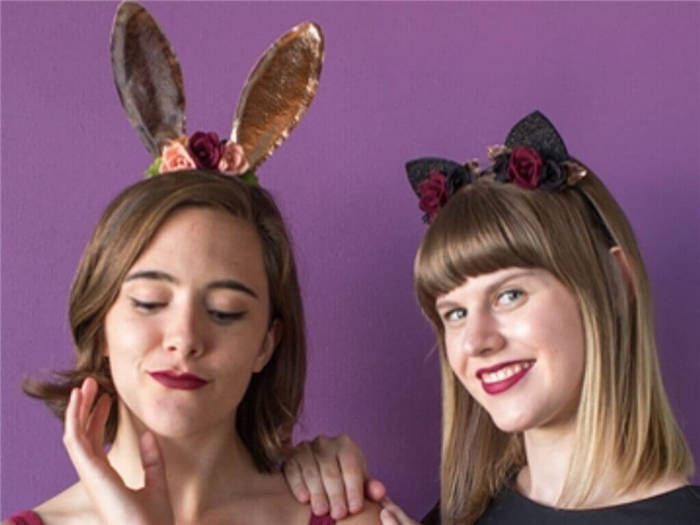
The second master class will be a little more complicated than the first one. We will make the decor of the ear of a bunny and a cat. Pretty headbands with ears are loved by romantic, positive girls. It does not require any special monetary investment in order to raise the spirits of yourself and others. How to make a headband with cat ears with your own hands? Watch the master class, and everything will be clear to you.
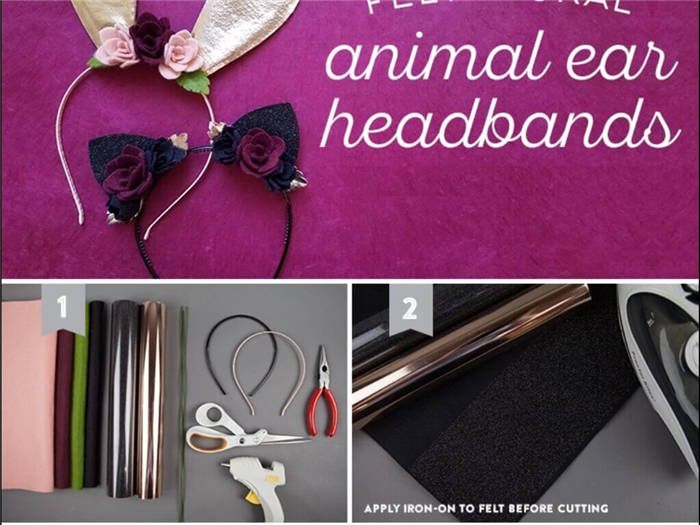
- 2 narrow headbands.
- Pieces of felt: black, maroon, green and pink.
- Gold or silver paper (you can replace it with food foil)
- Pliers to twist the wire.
- Wire thickness of 1-2 mm.
- A hot gun or Moment glue.
We take the wire in our hands. We cut two pieces, 40 cm each. These 2 pieces bend so as to give them the shape of an ear. The base will be 3-3,5 cm. We make a paper pattern of a hare's ear, placing the wire on the paper. Note: the paper ear should be double (photo 3). Next, screw our wire ear with its base to the rim (photo 4). Screw on the second ear, 7-8 cm from the first one. Dab the edges of the paper ears with glue and glue them (photo 5).
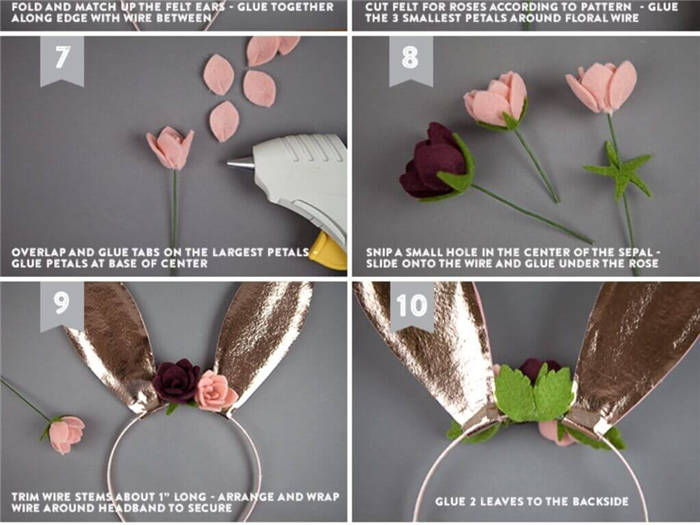
Next, we make 3 roses and leaves of felt and wire. Each rose has 12 small petals and a green star-shaped base (photo 8). How do you make the rose stick to the wire? It's easy: you need to take a bead or a small button and put the end of the wire into the bead or button. Twist the end of the wire at the base of the bead. Make a rose, using a glue gun or glue. Twist the stem of the rose around the rim, gluing or sewing a few leaves from the felt. The ears are ready.
How to make cat ears with your own hands
The image of a cat is very popular, no costume holiday can do without it. The most important attribute of the image – cat ears. This detail is the most popular and traditionally associated with a cat. In this article we will tell you a few ways to make cat ears with your own hands.
Option 1: Ears from cardboard
Following our instructions, you will make cat ears quickly and easily. For this, you need to get: a headband, ribbon and cardboard. You just need to wrap the hoop, cut out the ears and glue them on.
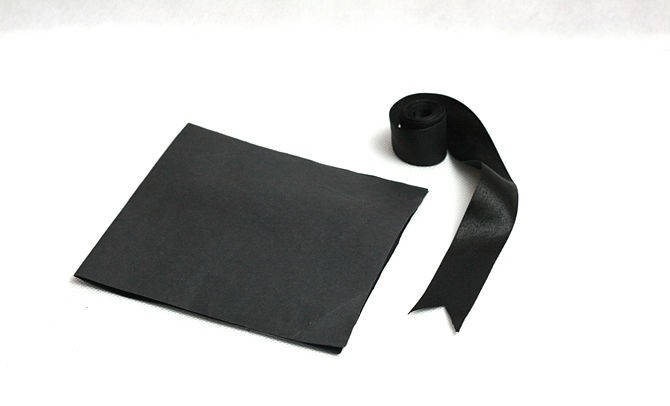
- Choose a color. What color cat do you want to dress up? Depending on this, you need to choose a ribbon and cardboard – white, gray, red or black.
- The hoop can be a different color, because you will wrap it with ribbon. The main thing is to choose a hoop of the right size.
- You can use white cardboard, having previously painted it in any other color.
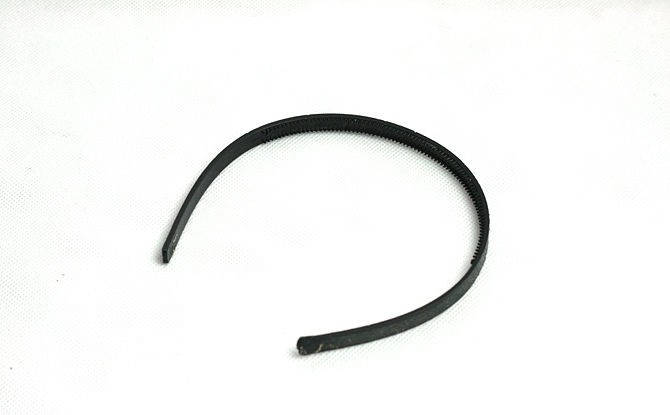
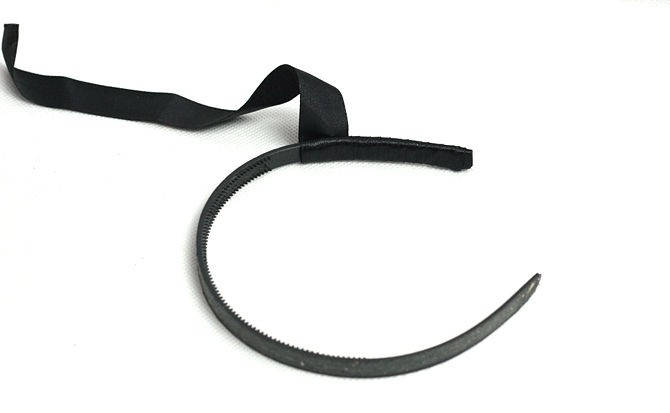
- Wrap the headband with ribbon.
- Take a long ribbon and attach one end to the headband. It is convenient to use glue, but wait until it dries completely.

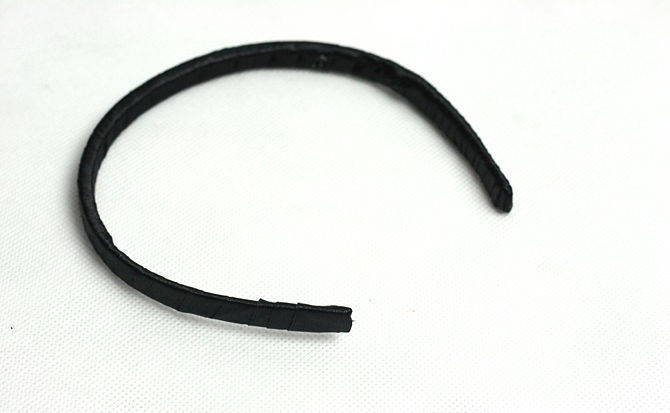
- Wrap the ribbon around the headband, overlapping each turn.
- When you get to the end, tie a knot and glue the edge of the ribbon to the edge of the hoop.
Recommendations
- The triangle shape is the simplest. If you have the strength and patience, you can make the ends rounded, but this way the ears will be harder to work with. Or look at pictures of cats and make the ears the same shape.
- You can go further and make a costume (cat ears and tail), but for that your sewing skills have to be at a high level.
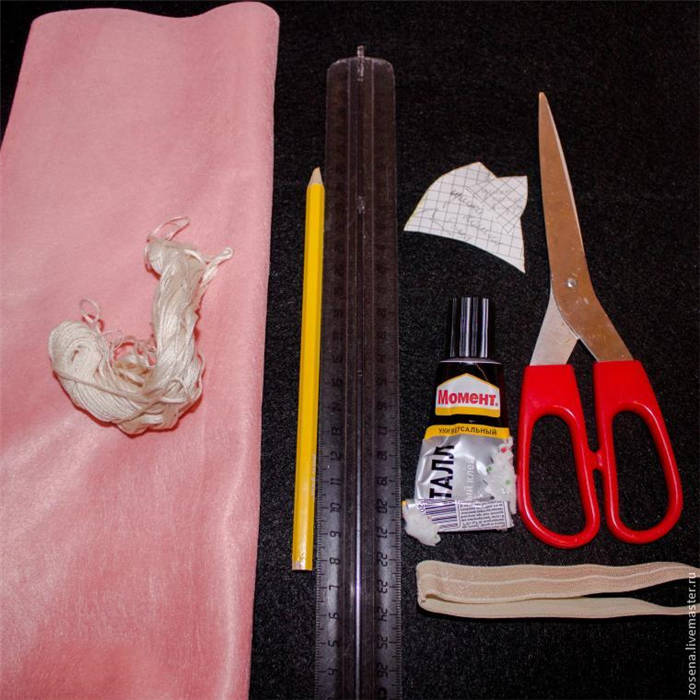
- Template
- Scissors
- Rubber band (about five centimeters wide), enough for a bandage
- Wire
- A small piece of fake wool
- Needle
- String
- Hot glue gun
- Paper
- Marker pens
- Scissors
How to make cat ears with your own hands
The image of a cat is very popular, no costume holiday can do without it. The most important attribute of the image – cat ears. This detail is the most popular and traditionally associated with a cat. In this article we will tell you a few ways to make cat ears with your own hands.
Option 1: Ears from cardboard
Following our instructions, you will make cat ears quickly and easily. For this, you need to get: a headband, ribbon and cardboard. You just need to wrap the hoop, cut out the ears and glue them on.
- Choose a color. What color cat do you want to dress up? Depending on this, you need to choose a ribbon and cardboard – white, gray, red or black.
- The hoop can be a different color, because you will wrap it with ribbon. The main thing is to choose a hoop of the right size.
- You can use white cardboard, having previously painted it in any other color.
- Wrap the headband with ribbon.
- Take a long ribbon and attach one end to the headband. It is convenient to use glue, but wait until it dries completely.
- Wrap the ribbon around the headband, overlapping each turn.
- When you get to the end, tie a knot and glue the edge of the ribbon to the edge of the hoop.
Recommendations
- The triangle shape is the simplest. If you have the strength and patience, you can make the ends rounded, but this way the ears will be harder to work with. Or look at pictures of cats and make the ears the same shape.
- You can go further and make a costume (cat ears and tail), but for that your sewing skills have to be at a high level.
- Template
- Scissors
- Rubber band (about five centimeters wide), enough for a bandage
- Wire
- A small piece of fake wool
- Needle
- String
- Hot glue gun
- Paper
- Marker pens
- Scissors
How to make cat ears
wikiHow operates on a wiki basis, which means that many of our articles are written by multiple authors. When this article was created, 13 people(s) worked on editing and improving it, including anonymously.
Cat ears are very popular at various costume parties. No cat costume is complete without cat ears. It is not expensive to make cat ears, because you can find all the materials you need at home. The simplest cat ears can be made out of thick paper. If you want more realistic ears, you will need cardboard and faux fur.
Making paper ears
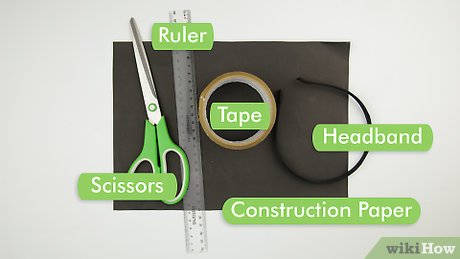
Draw the outline of your cat's ears. Draw two equilateral triangles on a piece of heavy paper. The optimal length of the side of the triangle is about 7.5 cm. When the triangles are ready, on one side of each triangle make an indentation allowance. This is where the ears will be attached to the headband. [2] X Source of information
Cut out the pieces. Take your scissors and cut the ears to the outline of the drawn parts. Place the parts on top of each other to check that they are identical (correct any inaccuracies if necessary). When both parts are identical, fold in the 1 cm allowance you made earlier.
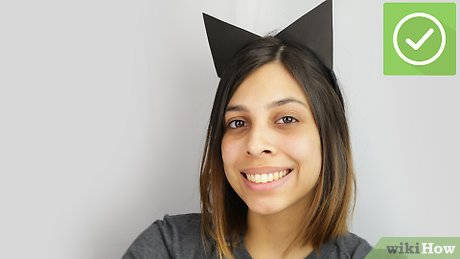
Allow the glue to set. If you glued the ears with glue, you need to wait a certain amount of time. If you used scotch tape, you can put the ears on without delay! If you want, you can make some improvements to your ears. For example, try to cut out two additional equilateral triangles from paper of another color with a side length of about 4 cm. Glue them with glue or tape to the front in the center of the main triangles of the ears.
How to make cat ears with your own hands
The image of a cat is very popular, no costume holiday can do without it. The most important attribute of the image – cat ears. This detail is the most popular and traditionally associated with a cat. In this article we will tell you a few ways to make cat ears with your own hands.
Option 1: Ears from cardboard
Following our instructions, you will make cat ears quickly and easily. For this, you need to get: a headband, ribbon and cardboard. You just need to wrap the hoop, cut out the ears and glue them on.
- Choose a color. What color cat do you want to dress up? Depending on this, you need to choose a ribbon and cardboard – white, gray, red or black.
- The hoop can be a different color, because you will wrap it with ribbon. The main thing is to choose a hoop of the right size.
- You can use white cardboard, having previously painted it in any other color.
- Wrap the headband with ribbon.
- Take a long ribbon and attach one end to the headband. It is convenient to use glue, but wait until it dries completely.
- Wrap the ribbon around the headband, overlapping each turn.
- When you get to the end, tie a knot and glue the edge of the ribbon to the edge of the hoop.
Recommendations
- The triangle shape is the simplest. If you have the strength and patience, you can make the ends rounded, but this way the ears will be harder to work with. Or look at pictures of cats and make the ears the same shape.
- You can go further and make a costume (cat ears and tail), but for that your sewing skills have to be at a high level.
- Template
- Scissors
- Rubber band (about five centimeters wide), enough for a bandage
- Wire
- A small piece of fake wool
- Needle
- String
- Hot glue gun
- Paper
- Marker pens
- Scissors